homepage

LOMAC/FC: Training Mission #03

Posted By: BeachAV8R

LOMAC/FC: Training Mission #03 - 12/18/06 11:16 AM


Continuing with the theme of learning basic aircraft control today we’ll explore more thoroughly navigating in the Su-25T and utilizing the multiple modes of the ACS-8 (Automatic Control System) autopilot. This mission was developed by Richard “Ironhand” Sorochak and for those unfamiliar, I’d highly recommend a visit to his awesome site that contains a wealth of information for both the neophyte LOMAC pilot and the experienced alike: http://flankertraining.com/ironhand/index.html The only changes I made to the mission was to substitute the Su-25T for the straight Su-25, and to make the mission require a take-off and landing.

Download the mission here: http://www.mudspike.com/lomac/simhq03.zip

Ironhand’s navigation training mission is an excellent way to practice using the instruments in the –T to learn to properly fly a mission profile. Being a strike pilot you are often required to hit your target at a very precise time for many reasons, chief among which are deconfliction with other aircraft in the area and also to assure you arrive on target in concert with other allied actions (jamming, SEAD flights, etc.). Our route today consists not only of waypoints, but also contains structures for us to fly over to show us that we are indeed on the correct path. Ironhand has sprinkled a few components of the S-300 SAM site along the route to give us reference points. These are only passive structures however, and there will be no threat to our passage.


Again we’ll be flying with clean wings with no ordnance; probably a wise decision for us button searching rookies.


After departing Maykop we head out to the northwest picking up the course line to the first waypoint. I’ve drawn the yellow course line on the map to show the flight planned route between the home base and waypoint #1. The HUD reflects the fact that we are on the proper course because the round director circle is centered in the HUD. Additionally, you can see the dual needles on the HSI are aligned with each other indicating we are on course.


To demonstrate how the needles show your position relative to the proper course, I’ve turned off-course for a few kilometers to illustrate how to interpret the needles. The important thing to remember is that you have two different needles that are giving you two different navigation solutions. The fat, white needle is your Programmed Course Needle and it always shows you the preflight planned course between two waypoints. Think of this needle as one you could lay down on your map and it will always align with the waypoint you are currently flying from in the direction of the waypoint you are flying to. It does not move or rotate unless you actually select a different set of waypoints. The skinny, yellow needle is the Next Waypoint pointer and it always points to the waypoint you have selected to navigate to. This needle is a “homing” needle in that it will continue to move as you fly around continuously pointing toward the selected waypoint. On the following map you can see that 45 degrees away from the intended track between the home base and waypoint #1. You can also intuitively see that in order to fly directly toward the waypoint I would obviously have to turn less to the right than I would if I wanted to get back onto the actual course line between the waypoints. That is why the Programmed Course Needle and the Next Waypoint needles are split. Only when the two needles are aligned are you actually on the proper path between waypoints. You can also see that the HUD director circle is showing that we need to fly to the right in order to get back on course.


Why is being on the proper path important? There are several reasons. In the real world deconfliction is one of the primary reasons. Wartime airspace can be very crowded and the possibility of a midair collision in congested airspace is a very real concern. Being where you are expected to be is an important tool in keeping you from trading paint with aircraft on other missions. The other good reason for staying on the proper flight planned path is that it is likely your pre-programmed route takes into account things such as terrain masking and avoidance of high threat areas as well as post-strike escape paths. By flying off course, you could be flying yourself into an enemy or friendly air defense zone!

In order to correct the needle misalignment, and get back on the proper flight path, I’ve taken up a heading of 330 to reintercept the flight planned path. The speed at which you get back on course depends directly on the intercept angle you choose: a shallow intercept (10 or 15 degrees) will get you back on course slower than a large intercept angle, 90 degrees being the greatest. Common sense says that somewhere between those extremes is probably prudent, perhaps 30 to 45 degrees. In the following graphic you can see in the top HSI I’ve taken about a 45 degree “bite” to get back on course. How do I know that I’m getting back on course? The skinny, yellow needle starts a bearing change toward the fat, white “course” needle. The bottom HSI reflects that bearing change a minute or so later as the yellow needle has “fallen” toward the course needle. When both needles lie on top of each other, you are back on course and can turn back direct to the waypoint. Winds aloft would complicate matters slightly, requiring a slight wind correction angle to keep the needles glued together, but for now we are working with light or non-existent winds aloft.


Reaching the first waypoint I turn right to pick up the next course between waypoint #1 and #2.


Argh - into the rising sun! Where is the sun visor in this thing? Oh, it’s attached to my helmet!


Cont…
Posted By: BeachAV8R

Re: LOMAC/FC: Training Mission #03 - 12/18/06 11:16 AM

Now we’ll test out a few of the autopilot modes. The first mode, and one of the most useful, is the Route Following mode. This can be engaged and disengaged using the “A” key or alternately, you can use the “ALT-6” key. The Route Following mode does exactly what it sounds like: it follows the preprogrammed route. Selecting this mode the “ALT” and “WP” lights illuminate in the cockpit and the autopilot will meticulously follow the flight planned route, cycling through the waypoints automatically. Note the “on course” indication on the HSI with both needles aligned with each other.


Route Following mode not only follows the waypoints but also follows the flight planned altitudes as well. Each route segment can contain a pre-programmed altitude which is found above the altitude readout in the HUD. If you are in Route Following mode the aircraft will automatically climb or descend in an attempt to maintain those altitudes. Again, altitudes are important considerations for fuel burn and avoiding threats. Here you can see the autopilot is following the directive to descend down to 200 meters.


Here we are approaching waypoint #2 at low altitude; you can see the S-300 radar tower ahead.


Even when the aircraft is on the autopilot you can still manipulate the controls. You can forcefully override the autopilot just by inputting commands via your stick but the autopilot will not disengage until you exceed the autopilot limits. The manual lists these limitations as +/- 60 degrees of bank and +/- 35 degrees of pitch. Additional limits are 15 degrees of Angle of Attack (AOA) and a maximum of 3 Gs. I ran through a quick test of these limits and they indeed function as advertised, with the autopilot kicking off at or near the published limits.


In the event you want to momentarily exceed the limits of the autopilot, or make a manual correction while in an autopilot mode, it is possible to temporarily disconnect the autopilot without actually disengaging the mode it is in. The “momentary override” is engaged by holding down the ALT ~ key combination. This switch is very similar to the “TCS” switch (Touch Control Steering) in the airplanes I fly. Depressing the TCS button on the yoke allows for a temporary disconnect of the autopilot to manually control the aircraft and letting go of the switch allows the aircraft to revert back to the autopilot without having to go through pushing multiple buttons to disengage and reengage a specific mode.

An interesting artifact of overriding the autopilot using control inputs (ie: exceeding the limitations causing the autopilot to kick off) is that the automatic control system senses your control inputs on the control stick and attempts to counter them using trim until the autopilot reaches the hard limits. When the autopilot kicks off you will suddenly have your hands full because now you likely have full trim opposite your control input to deal with and trim out. I was amazed that they modeled this and though I’m not sure this is an exact replication of how it works in the Su-25T, I can tell you for sure that this is very much the way it works in many of the aircraft I fly. If you are on the autopilot and manually pull back on the yoke the autopilot trim starts kicking in to try to counter that input. If you exceed the limits of the autopilot (called “torque/roll limits” in our aircraft) it will kick off and there is a rather abrupt pitch or roll that is pretty ugly to feel. In any case, in the Su-25T, if you are not ready for the trim imbalance, you can rapidly find yourself in dire straits if you are at low altitude or otherwise preoccupied. My advice is to only engage and disengage the autopilot using the key commands and to only do so when you are in relatively stable flight (with one exception to be looked at later).

We’ve worked our way around the short navigation problem so I take the aircraft past the airbase to try out some of the other autopilot modes to get familiar with them.


The next mode we engage is one of my favorite, the Attitude Hold mode. This is a convenient mode for when you just want to quickly maintain a pitch and bank angle and have the autopilot hold it there while you do something. You engage this mode by hitting the ALT-1 key and curiously only the ALT annunciator illuminates which is odd since it isn’t an altitude holding mode at all. Keep in mind that attitude hold can get you into trouble if you are at high altitudes, high pitch angles, or high bank angles. If you don’t have the airspeed to maintain the pitch you could end up stalling and losing control of your aircraft. Additionally, engaging attitude hold in nose-down attitudes can result in excessive build-ups of airspeed and/or if you get distracted the nose-down pitch can eventually run you into the ground. I consider Attitude Hold to be a temporary autopilot mode only.


Cont…
Posted By: BeachAV8R

Re: LOMAC/FC: Training Mission #03 - 12/18/06 11:17 AM

The Altitude and Roll Hold mode is a very useful mode for maintaining your position over a single spot such as setting up an orbit over a target (provided it is a low threat area) or when waiting for some other event to occur. Using ALT-2, this mode will hold your altitude and bank angle indefinitely; a nice and stable mode that will allow you to read the manual (I’ll be using this mode frequently).


Remember when I recommended only engage and disengaging the autopilot when in relatively stable flight with one exception? This is the exception: Transition to Level Flight mode. Otherwise known as the Panic Button this autopilot mode will correct any unusual attitude and roll you to wings level. Pressing ALT-3 engages this mode and it uses the proper method of upset recovery by first applying corrections to roll before attempting to arrest a pitch excursion. Once bank angle is less than 7 degrees and pitch is within 5 degrees level the autopilot engages barometric altitude hold to keep you in level flight. Obviously this is a good mode if you feel things are unraveling but it probably won’t be as aggressive as corrective action you could take on your own (provided you fly the aircraft up to, but not past it’s limits..ie: accelerated stall). Another use for this mode is for getting the aircraft into “neutral” trim since engaging this mode will trim the aircraft for level flight. Once the trim is set you can disengage this mode and have a “trim friendly” aircraft!


Another mode that I was initially confused about is the Barometric Altitude Hold mode. I was confused because engaging this mode (ALT-4) causes both the ALT and ROLL annunciators to illuminate. I was under the impression that the only function this mode would serve would be to hold the current altitude but it also allows you to roll the aircraft and have the aircraft maintain that bank angle throughout the duration of the engaged mode. So if you want to maintain 3000 meters you can engage this mode and then you can vary the bank angle between 0 and 60 degrees (the bank angle limit of the ACS) by just moving the stick and it will maintain an infinite number of bank angles.


Those of us that have flown Falcon 4 or Jane’s F-15 remember fondly the terrain following modes of those aircraft. The excitement of rocketing into the target at low level, just a couple hundred feet off the deck, is one of the highlights of combat flight simming. The Su-25T has also has a Radio Altitude Hold mode that uses the radar (radio?) altimeter to maintain your aircraft above the terrain. Selected using ALT-5, the Radio Altitude Hold mode ostensibly maintains your aircraft at the radar altimeter height at which it is engaged. Coincident with this mode is the Terrain Avoidance sub-mode which kicks in during other modes as well (barometric altitude hold and attitude hold) if the parameters are met that could lead to a possible collision with the ground (radar altimeter reading less than half the initial barometric altitude setting or a rate of descent measured by the radar altimeter of greater than -50 m/s.). I’ve found the Radio Altitude Hold to work fairly well at higher settings in relatively flat terrain, but after taking the –T into the rolling hills southeast of Maykop and having some close calls with the Terrain Avoidance system, I doubt I’ll rely heavily on this system since it’s performance is marginal (I’m assuming the real aircraft TF autopilot might not be very trustworthy either?)


There is one additional autopilot mode called the Combat Steering mode that is substituted for the Route Following mode when a target is locked into the weapons system (specifically the “Shkval” targeting system). For now we’ll skip over this mode until we can see it in action.

After playing around with the autopilot and getting a feel for the different modes (very capable and well simulated system!) I head back to the airport to finish up the mission. Using the RETURN navigation sub-mode the autopilot takes me to the beginning of the instrument procedure at Maykop and sets me up for the long straight-in ILS approach.


After traveling outbound to the initial approach fix (what I would call it anyway) the autopilot commands an inbound turn and you can see the target airspeed and altitudes change above the current airspeed and altitude readouts (desired speed about 310 kph).


The HUD automatically changes over to LANDING mode which gives lateral and glideslope guidance on the HUD using the director circle and a glideslope circle in addition to the more traditional needles down in the cockpit. The “K” symbol and the sort of “I” symbol indicate localizer and glideslope signals respectively are being received.


I continue to let the autopilot fly the full approach while I try to take in all of the symbology and processes. No doubt the autopilot flew a much better approach than I could have managed.


Cont…
Posted By: BeachAV8R

Re: LOMAC/FC: Training Mission #03 - 12/18/06 11:17 AM

Approaching the runway; the manual states that it is recommended to disengage the autopilot (ACS) at a radar altitude of not less than 100 meters AGL and to proceed with a manual landing from that point.


Upon landing I get a bit squirrelly and end up shredding a few tires, but thankfully the aircraft remains upright and all I have to suffer is the indignity of being towed into the apron instead of being pried out of the burning cockpit by the crash/fire/rescue team.


This was a fantastic mission and I really felt like I learned a lot about the autopilot and navigation capabilities in this one hop. Utilizing the autopilot relieves a lot of the workload when dealing with complex aircraft systems (true in my field too) and a full understanding of the capabilities and limitations will go a long way toward making your life easier and making your mission more likely to be a success. As I peel back each layer of this sim I’m amazed at how well they have modeled this aircraft and am also having a blast just flying the airplane around. It can only get better when we get to blow some stuff up right?!

Thanks again to Ironhand for allowing me to use and modify his mission to suit my purposes. Again, I highly recommend visiting his site to learn a LOT more about some of the stuff I’m trying my best to learn as well: http://flankertraining.com/ironhand/index.html

This mission download: http://www.mudspike.com/lomac/simhq03.zip

BeachAV8R
Posted By: 159th_Viper

Re: LOMAC/FC: Training Mission #03 - 12/18/06 11:56 AM

Great Work - Keep them coming
Posted By: Valter

Re: LOMAC/FC: Training Mission #03 - 12/18/06 12:02 PM

Excellent!
Thanks a lot.
Posted By: Manta

Re: LOMAC/FC: Training Mission #03 - 12/18/06 01:14 PM


Thanks!!!!

Posted By: Destructis

Re: LOMAC/FC: Training Mission #03 - 12/18/06 02:36 PM

Great job on these reports. I find it really interesting how you are only concentrating on one type of aircraft also.
Posted By: EricJ

Re: LOMAC/FC: Training Mission #03 - 12/18/06 02:37 PM

Good read BeachAV8R ;\)
Posted By: Joe

Re: LOMAC/FC: Training Mission #03 - 12/18/06 03:41 PM

Thanks for your desscription of the HSI waypoint pointer and course indicator needles. I think it makes a lot more sense now... I can always get good at weapons employment in a sim, but navigation's never been my thing. Coming from Jane's F-18, I'm lost without that beautiful colored moving map with printed course lines.

I've always flown Lock On's Russian aircraft with Russian HUDs/cockpits, but it certainly seems much easier with the english labels. Perhaps I'll make the realism concession in the interest of gameplay.
Posted By: BeachAV8R

Re: LOMAC/FC: Training Mission #03 - 12/18/06 06:21 PM

Indeed Joe...a picture is worth a thousand words..which is why a moving map display (even a relatively basic line drawing of your steerpoints like in Falcon 4) is worth so much for situational awareness. Without a moving map you really have to spend a little more time mentally converting the needles and headings into a map in your head to always keep aware of where you are, where you are going, and possible escape routes.

Quote:
I've always flown Lock On's Russian aircraft with Russian HUDs/cockpits, but it certainly seems much easier with the english labels. Perhaps I'll make the realism concession in the interest of gameplay.
Yeah..I was thinking about just starting off using the Cyrillic HUD and cockpit, but I figured in this global economy I could suspend my disbelief and make it seem like the -T I was flying was an export model :p ....

BeachAV8R
Posted By: Shepski

Re: LOMAC/FC: Training Mission #03 - 12/18/06 06:25 PM

Great stuff Beach! Nice to see you finally getting aboard the -25T and wringing it out!

I have always used Russian symbology from day 1 with Eagle Dynamics products and you get to know what the symbols mean rather then have to know what the characters actually spell. A much more immersive experience IMO. \:\)

Keep them coming!
Posted By: BeachAV8R

Re: LOMAC/FC: Training Mission #03 - 12/18/06 07:36 PM

By the way...if you are interested in seeing a video with voice over that does a really outstanding job of showing how the navigation principles work in motion...go to Ironhand's website at this link and scroll down to the "VIDEO :: The ADI and HSI: NAVIGATION IN THE STEAM GAUGE WORLD" file and download and view it: http://flankertraining.com/ironhand/flightbasics.htm It is a great way to see how the needles work in motion!


BeachAV8R
Posted By: Tom_Weiss

Re: LOMAC/FC: Training Mission #03 - 12/18/06 07:55 PM

Chris, when you reach #5 I'll make a downloadable pdf of them.
Posted By: BeachAV8R

Re: LOMAC/FC: Training Mission #03 - 12/18/06 09:45 PM

Quote:
Originally posted by Thomas DW:
Chris, when you reach #5 I'll make a downloadable pdf of them.
Thanks Thomas! That sounds like a great way to make them available "offline"...


BeachAV8R
Posted By: Tom_Weiss

Re: LOMAC/FC: Training Mission #03 - 12/18/06 10:07 PM

\:\)
Posted By: EricJ

Re: LOMAC/FC: Training Mission #03 - 12/18/06 10:41 PM

Quote:
Originally posted by BeachAV8R:
Indeed Joe...a picture is worth a thousand words..which is why a moving map display (even a relatively basic line drawing of your steerpoints like in Falcon 4) is worth so much for situational awareness. Without a moving map you really have to spend a little more time mentally converting the needles and headings into a map in your head to always keep aware of where you are, where you are going, and possible escape routes.

Quote:
I've always flown Lock On's Russian aircraft with Russian HUDs/cockpits, but it certainly seems much easier with the english labels. Perhaps I'll make the realism concession in the interest of gameplay.
Yeah..I was thinking about just starting off using the Cyrillic HUD and cockpit, but I figured in this global economy I could suspend my disbelief and make it seem like the -T I was flying was an export model :p ....

BeachAV8R
This is what you'll get with the Su-27/33/MIG-29A and S when you select A2G mode:


Not extensive as most would like, but in most cases it's good enough by simply looking out of the cockpit and doing terrain association, as well as going over the route in the Mission Editor.

And it should be noted that the bottom Waypoint is of course #1, while the last waypoint before a "landing" waypoint will not be shown for clarity's sake. As you can see I'm really not following the route, but it still helps guide you when needed, along with of course predesignated targets.
Posted By: BeachAV8R

Re: LOMAC/FC: Training Mission #03 - 12/18/06 11:32 PM

Yeah..that is definitely at least a bare bones graphical display of where you are relative everything else. It really can make a big difference as far as situational awareness goes. Of course..the best thing is something like the F-15E where you have a whole 'nother person in the back seat telling you how lost you are.. :p

BeachAV8R
Posted By: EricJ

Re: LOMAC/FC: Training Mission #03 - 12/19/06 01:21 AM

lol I agree. There are some places I still haven't been in, mainly the Caucauscus region, but that's okay. BTW here's a more practical look at it (includes ACMI file as well):

http://562.50megs.com/LOMAC/Tracks/Wayflight.rar
Posted By: Dr. Shocker

Re: LOMAC/FC: Training Mission #03 - 12/19/06 01:56 AM

Beach, you can also use route following mode along with radio altitude hold. You'll have three of the autopilot lights turned on in that instance. Turn on route follow first then radio alt.
Posted By: Corsair8X

Re: LOMAC/FC: Training Mission #03 - 12/19/06 02:10 PM

These training missions you write as always are excellent. I don't have FC yet, and I didn't have any intention of getting it, but you are making this aircraft very interesting and now I'm definitely thinking of it.

And a big thanks for pointing the way to FlankerTraining.com. I only watched the latest video out of curiosity and the production quality and amount of information passed on is incredible. I will have a lot of stuff to watch tonight I suspect.
Posted By: BeachAV8R

Re: LOMAC/FC: Training Mission #03 - 12/19/06 06:01 PM

Dr. Shocker - Thanks for the tip..those subtle little nuances to what you can do in the airplane are important.. \:\)

Corsair - Glad you are enjoying them...I'm having a blast learning to "handle" the Su-25T. It is probably the most difficult simulated aircraft I've ever tried to learn..just from the standpoint of it requires a good bit of attention and care to fly safely. I'm really enjoying the challenge. And since it is modeled in such detail it really has a lot of longevity if you want to learn it in-and-out. I wish flight sims companies would do more of the F4:AF / Flaming Cliffs / Black Shark type sims that model aircraft to ultra high standards instead of sims that offer up 10 or 20 different "light" platforms. I'm much happier digging into the books and learning something very detailed and complex. I think that is why I always enjoyed doing the reviews on Flight Simulator add-on aircraft..they are always so complex and modeled in excruciating detail.

Thanks for the comments..looking forward to flying #4 today.. \:\)

BeachAV8R
Posted By: RSoro01

Re: LOMAC/FC: Training Mission #03 - 12/19/06 06:24 PM

Hi Beach,

Another great read. And thanks. \:\)

Rich
Posted By: EvilBivol-1

Re: LOMAC/FC: Training Mission #03 - 12/19/06 11:04 PM

Quote:
Thanks for the comments..looking forward to flying #4 today.. \:\)
Looking forward to reading it!
Posted By: Tracy

Re: LOMAC/FC: Training Mission #03 - 12/20/06 02:48 AM

Hey Beach,
Just a quick note to say I am really enjoying your tutorials. I have always found the SU-25T very difficult to fly, especially when also dodging missiles and trying to line up ground targets !
I had no idea regarding all the different auto pilots. Your tutorials seem to make things much easier to understand than the manual.
Thanks !
Tracy
Posted By: EricJ

Re: LOMAC/FC: Training Mission #03 - 12/20/06 04:45 AM


One thing I should have caught man, is I wouldn't personally shoot for the small circle. I guess maybe it's because I've never flown a real aircraft, but when I do carrier landings (and actually land) I shoot for the larger circle, which will bring the small circle which you've highlighted in line with the larger circle. Once I did that I found it much easier to land and consequently induce less stress in landing, least in my case anyways..
Posted By: BeachAV8R

Re: LOMAC/FC: Training Mission #03 - 12/20/06 05:08 AM

Quote:
Originally posted by EricJ:
I shoot for the larger circle, which will bring the small circle which you've highlighted in line with the larger circle.
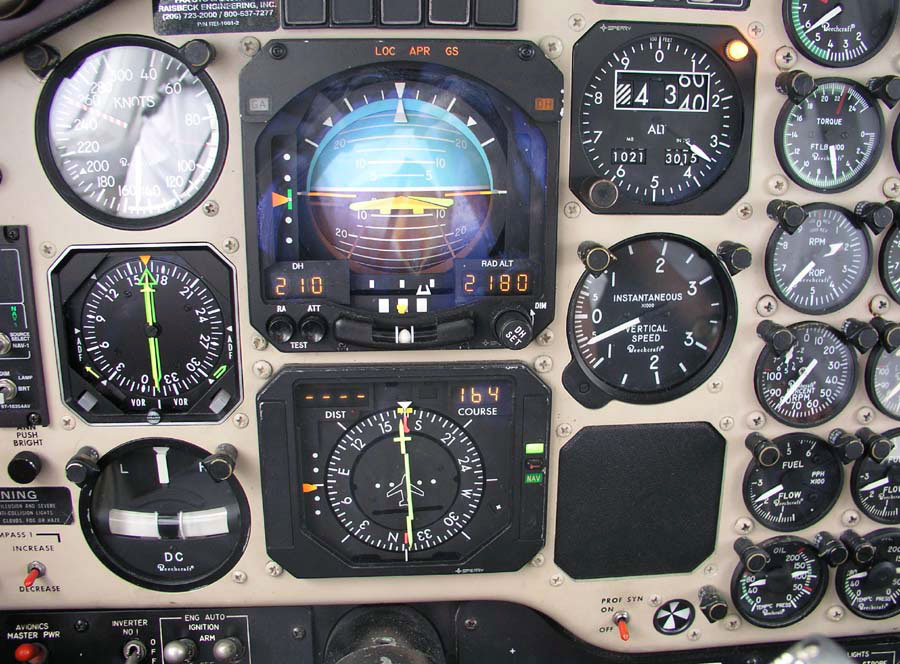
Yeah..actually after flying mission #4 I realized that is exactly the way it works (as you described)..after going from ENROUTE mode to RETURN TO BASE mode if you follow the larger circle it will eventually line you up with the little circle in LANDING mode. Then..just keep the two together and it takes you right down the glide-path. Basically I guess it is the same as the cross-pointer or V-bars in the types of planes I fly (flight director types). For instance..here is the flight director in the B200 I fly..the yellow "V" bars:


Takes a bit getting used to the two circles..but I'm getting there. I also have to spend a bit of extra time interpreting the Russian HUD attitude indicator because the way the little turn symbol moves on the HUD takes a bit of getting used to.

Regards..
BeachAV8R
Posted By: EricJ

Re: LOMAC/FC: Training Mission #03 - 12/20/06 05:47 AM

Ahh okay man, thanks! \:\)
Posted By: RSoro01

Re: LOMAC/FC: Training Mission #03 - 12/20/06 10:36 AM

Quote:
Originally posted by BeachAV8R:
...after going from ENROUTE mode to RETURN TO BASE mode if you follow the larger circle it will eventually line you up with the little circle in LANDING mode...
That's because, no matter what NAV mode you are in, the large circle remains the Director Circle. Even in LANDING mode, it is telling you where to fly to be at the proper altitude and on the proper courseline for what you are doing. Keeping it HUD center will keep the smaller circle centered, too. The smaller circle is simply there to help you refine your altitude and course. It's much easier to tell if the two are centered on each other than if the larger circle is centered on the HUD. Like everyone else, it took me awhile to realize that, too. I kept thinking of them as the HUD represntation of the ILS lines on the ADI which, evidently, they are not.

Rich
Posted By: Eric

Re: LOMAC/FC: Training Mission #03 - 12/20/06 03:40 PM

As far as I can tell, the yellow lines on the artificial horizon function just like the large circle in the HUD, directing you to the small circle's desired flight path. On the left and top side the ....O.... indicates the airplanes position relative to the desired flight path, like an american system.
Posted By: EvilBivol-1

Re: LOMAC/FC: Training Mission #03 - 12/20/06 11:17 PM

As I learned in one of Rich's ancient training tracks, the Russian ADI is actually the most intuitive and easy instruments to follow once lined up on course. In other words, use the HUD/HSI to find your desired course line and altitude, then the ADI to stay there. On final, the ADI is priceless. You get horizontal and vertical deviation marks, desired altitude bar and a course correction needle all in one instrument.
Posted By: Zorg12

Re: LOMAC/FC: Training Mission #03 - 01/28/10 01:11 PM

Another great, informative and helpful report!
Posted By: Capt Haddock

Re: LOMAC/FC: Training Mission #03 - 05/01/11 10:00 PM

I'm reading these series of articles many years after they were originally posted and they are still incredibly useful if you are discovering the newer FC2 like me. Many thanks!

About the "ALT" button on the autopilot panel:

You asked why the "altitude" or "ALT" light was ON when you selected "Attitute Hold". The answer is that the English cockpit has been wrongly labelled. On the Russian cockpit the button says "AY" (or "AU" in Latin alphabet) for "Auto Urobiya" or "Auto Level". So there you go, it should say "AL" not "ALT" smile
© 2024 SimHQ Forums