Posted By: Freiherr_Wulff
Tutorial Shader Layers - Skinning - 11/02/12 12:13 PM
Hey I said to someone in PM I would do a tutorial on basic shader layers for skinning so here it is.
Firstly I use DXTbmp, Paint, Irfanview (freeware) and Photoshop Elements, I have Paint shop Pro too but Elements is more basic but still a very good program.
1.) Ok so you have your bmp file, rename it Shader (Shader Layer, Background) I'll just use Shader. Open Shader up in Irfanview click image scroll down to convert to grayscale click then save as bmp always keep as bmp, now you should have a basic shaded image.
2.) Now from the image we have just created we need to remove the details we do not want on a shader layer. We want to remove the metals, Insignia's. Serials etc. So now we open Shader up in Paint. We start a process of select, copy and paste. Don’t forget We can use flip horizontal and vertical to blend the textures better, but basically we’re selecting from one area of the skin copying it to another to hide what is there, we can use smudge/blur tools later in our other program to blend better but we should end up with something looking like this at point of saving.
3.) Now we duplicate Shader rename new Ribs (Ribs Layer), on this layer we draw our rib structure, now we want to keep this basic at the moment for alignment reasons we will need to come back to this part. Tools for drawing Ribs structure would be Line Tool, Spray Can, Smudge Tool, Blur Tool, The easier way of doing this is to print out our shader layer onto A4 draw our ribs structure on with a pencil then rescan back into the computer that image not forgetting to rescale. We should end up with something like this
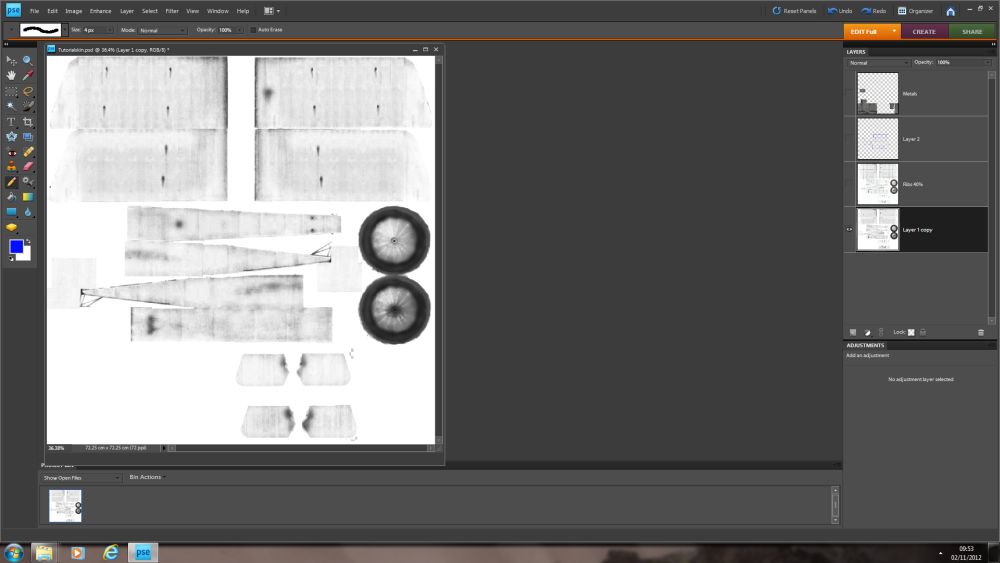
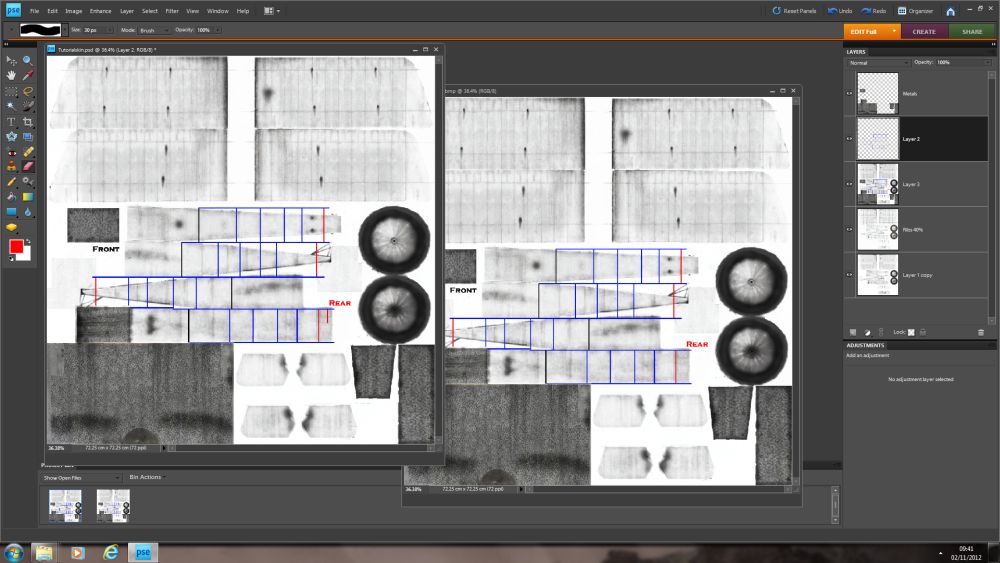
4.) Now we want to draw a grid so we can correctly align our rib structure, this is the part where we will be doing a lot of saving converting loading game taking screenshot coming out of game editing bmp converting loading game screenshot and so on. Basically what we want to do is open our Shader, and our Rib Layer in Elements copy them onto each other as separate layers then you want to create a 3rd layer to draw our grid on,. Best to start at the top of the fuselage, by drawing a line over each of your drawn ribs you will build up a grid structure like so.


At this point it be a good idea to save it as a project file in Photoshop Elements that’s a PSD or PDD file, Then what we want to do is merge and flatten image and save as bmp this will create our new skin
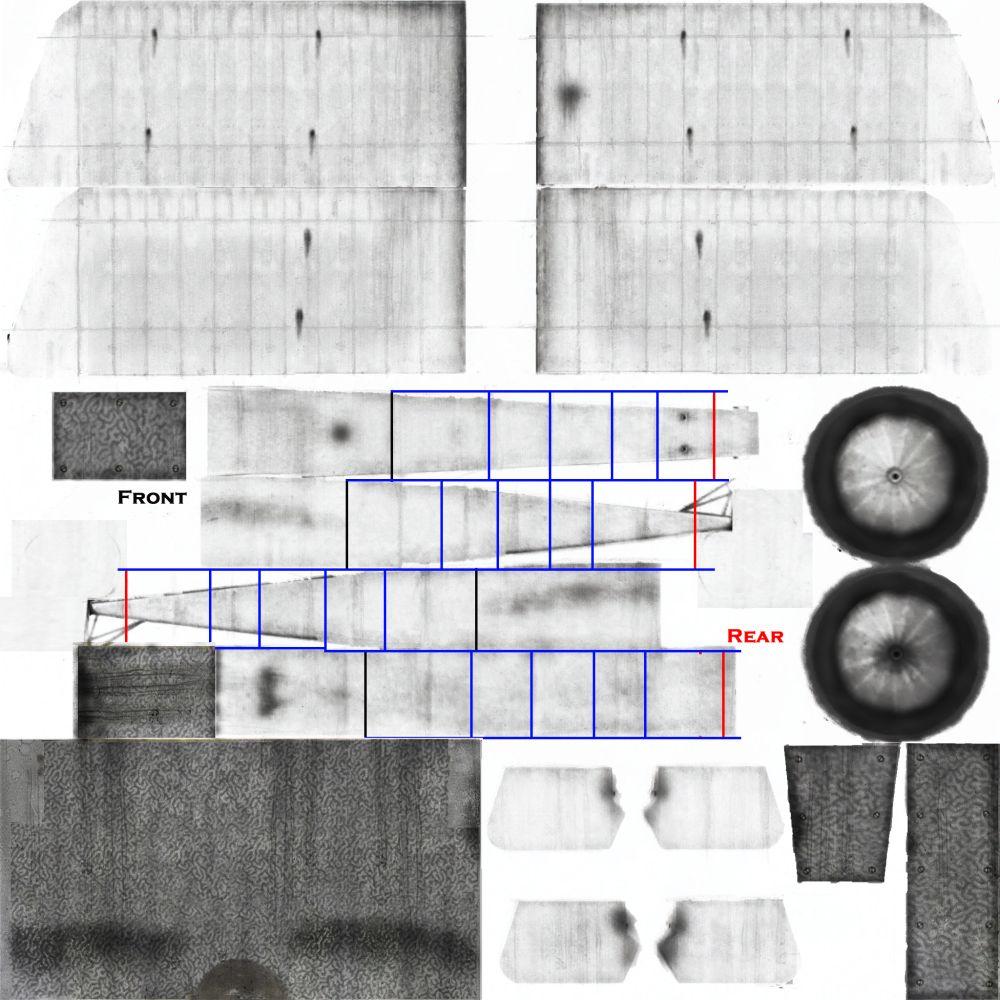
5.) Converting our new skin back to DDS and loading it into game we check our grid.
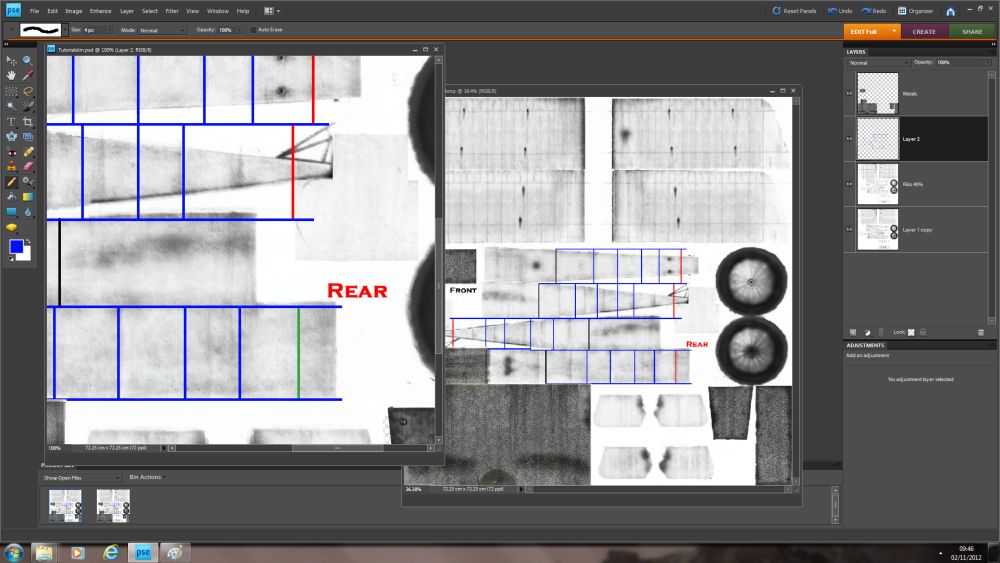
We can see an error in game on our grid.right by the tail

Fix error on skin in Paint with Select, Cut and Paste and save. I’ve hide where I’ve cut from just to highlight what we did in section 2 but we do not actually need to do that at this point because we are not keeping this skin. (Remember we checked in game and it’s aligned)
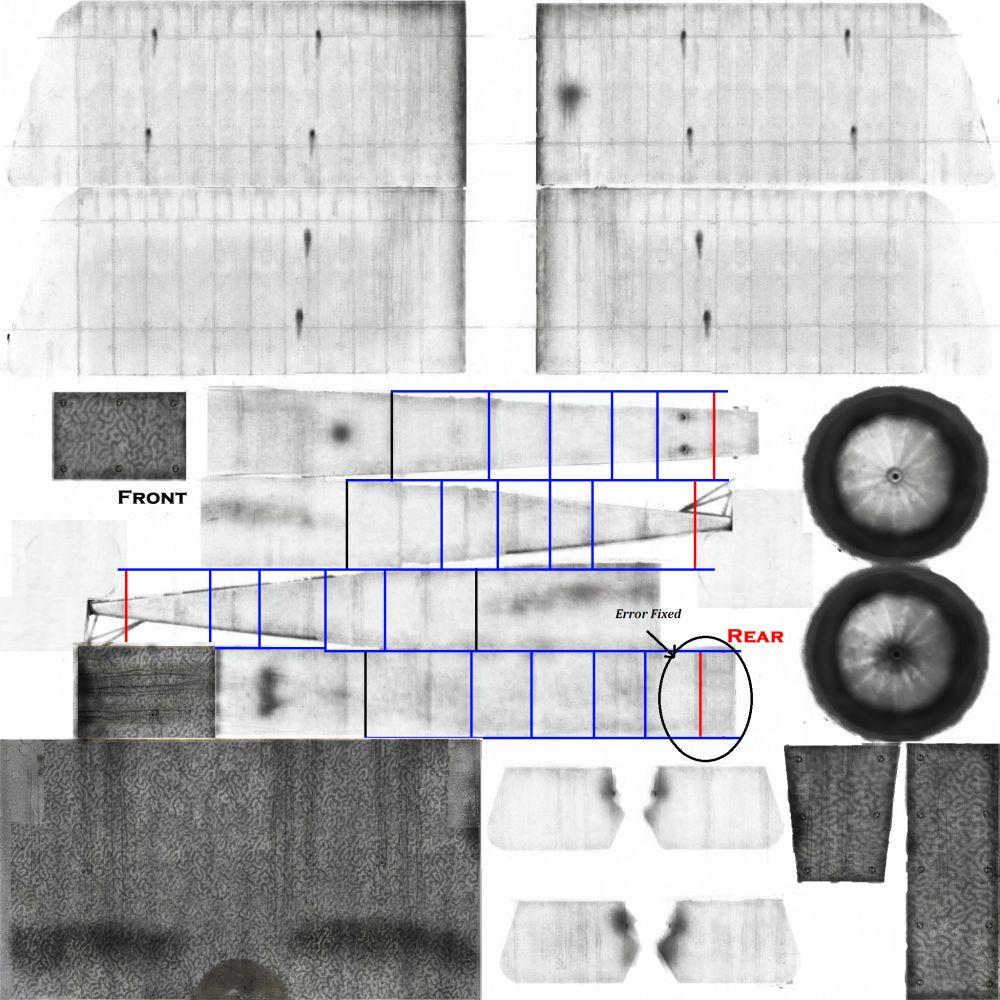
Now we load our Project File put that skin as a 4th layer in our Project File (The layer below the one I've highlighted), on our grid layer we erase the line that’s wrong and correct it using the 4th layer as the guide

Now we can delete that 4th Layer
Now we have our grid all aligned nicely and in place we can use it now to realigned our rib structure using cut and paste on our Ribs Structure layer, then we can use copy and paste to cover the gaps created by moving the ribs exactly like in section 2,only this time we are not using Paint. Remember in some programs copy and paste creates new layers, just remember to merge visible and do not discard non visible layers when doing this.
Sorry no picture on last bit, I haven't come back to this bit yet
Tip
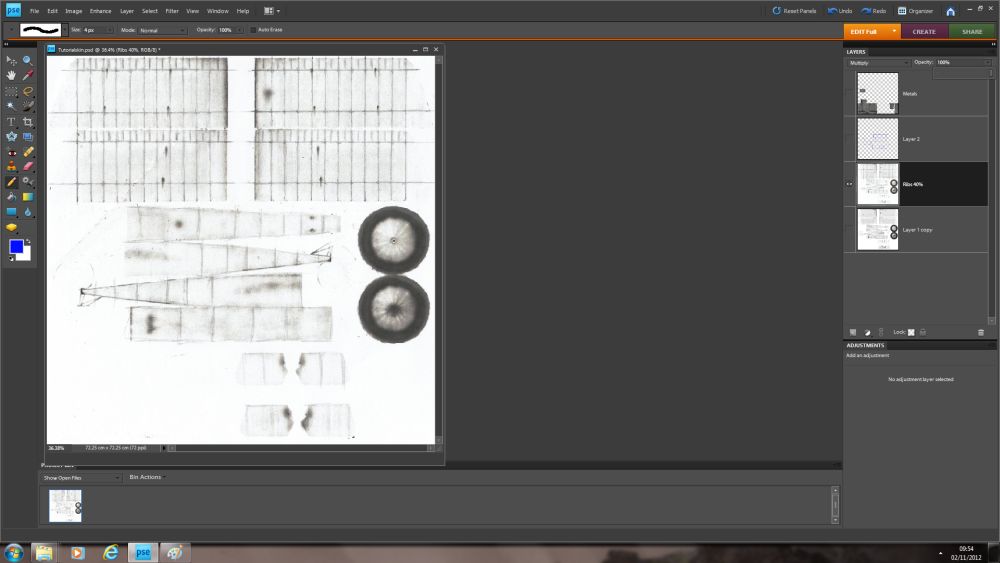
I keep my Ribs Structure Layer and my Shader Layer separate always my Shader is a Background and my Ribs a foreground layer my Ribs are normally set to multiply and at about 40% yours will obviously be to yours and the models preference. Oh and you can use other planes to create shaded layers too end of the day its building up the layer by copy and paste you can get your grayscale from anywhere.
Firstly I use DXTbmp, Paint, Irfanview (freeware) and Photoshop Elements, I have Paint shop Pro too but Elements is more basic but still a very good program.
1.) Ok so you have your bmp file, rename it Shader (Shader Layer, Background) I'll just use Shader. Open Shader up in Irfanview click image scroll down to convert to grayscale click then save as bmp always keep as bmp, now you should have a basic shaded image.
2.) Now from the image we have just created we need to remove the details we do not want on a shader layer. We want to remove the metals, Insignia's. Serials etc. So now we open Shader up in Paint. We start a process of select, copy and paste. Don’t forget We can use flip horizontal and vertical to blend the textures better, but basically we’re selecting from one area of the skin copying it to another to hide what is there, we can use smudge/blur tools later in our other program to blend better but we should end up with something looking like this at point of saving.
3.) Now we duplicate Shader rename new Ribs (Ribs Layer), on this layer we draw our rib structure, now we want to keep this basic at the moment for alignment reasons we will need to come back to this part. Tools for drawing Ribs structure would be Line Tool, Spray Can, Smudge Tool, Blur Tool, The easier way of doing this is to print out our shader layer onto A4 draw our ribs structure on with a pencil then rescan back into the computer that image not forgetting to rescale. We should end up with something like this
4.) Now we want to draw a grid so we can correctly align our rib structure, this is the part where we will be doing a lot of saving converting loading game taking screenshot coming out of game editing bmp converting loading game screenshot and so on. Basically what we want to do is open our Shader, and our Rib Layer in Elements copy them onto each other as separate layers then you want to create a 3rd layer to draw our grid on,. Best to start at the top of the fuselage, by drawing a line over each of your drawn ribs you will build up a grid structure like so.
At this point it be a good idea to save it as a project file in Photoshop Elements that’s a PSD or PDD file, Then what we want to do is merge and flatten image and save as bmp this will create our new skin
5.) Converting our new skin back to DDS and loading it into game we check our grid.
We can see an error in game on our grid.right by the tail
Fix error on skin in Paint with Select, Cut and Paste and save. I’ve hide where I’ve cut from just to highlight what we did in section 2 but we do not actually need to do that at this point because we are not keeping this skin. (Remember we checked in game and it’s aligned)
Now we load our Project File put that skin as a 4th layer in our Project File (The layer below the one I've highlighted), on our grid layer we erase the line that’s wrong and correct it using the 4th layer as the guide
Now we can delete that 4th Layer
Now we have our grid all aligned nicely and in place we can use it now to realigned our rib structure using cut and paste on our Ribs Structure layer, then we can use copy and paste to cover the gaps created by moving the ribs exactly like in section 2,only this time we are not using Paint. Remember in some programs copy and paste creates new layers, just remember to merge visible and do not discard non visible layers when doing this.
Sorry no picture on last bit, I haven't come back to this bit yet
Tip
I keep my Ribs Structure Layer and my Shader Layer separate always my Shader is a Background and my Ribs a foreground layer my Ribs are normally set to multiply and at about 40% yours will obviously be to yours and the models preference. Oh and you can use other planes to create shaded layers too end of the day its building up the layer by copy and paste you can get your grayscale from anywhere.