Re-reading my last couple of posts on Steel Fury, they perhaps gave a slightly less favourable impression of the sim than I think it deserves, so to balance it out a bit....
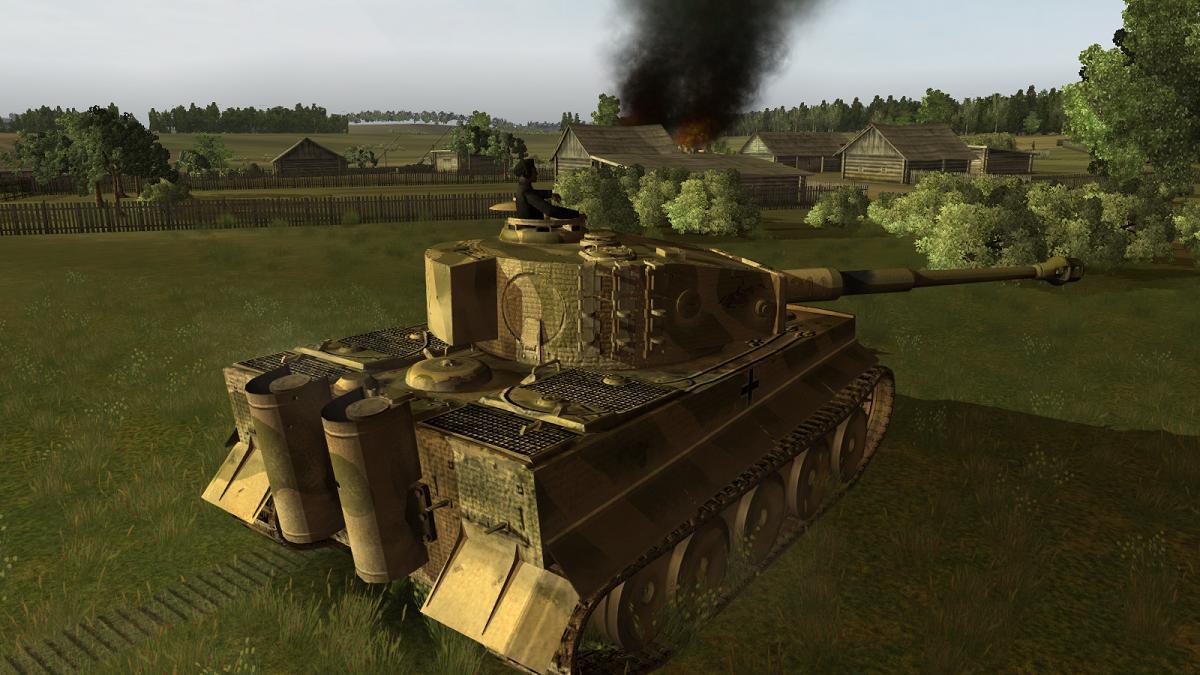
...I'm still not as brave (or mad!) as players like Kyth who think nothing of tackling T-34s in pre-war Czech-built light tanks like the Panzer 38(t). But recently, I decided finally to forgo the pleasure of beating up Ivans with my Tiger or Panther in user-made missions and instead, to play through for the first time the stock Steel Fury German campaign. And so far it's been a lot of fun, and quite well done...
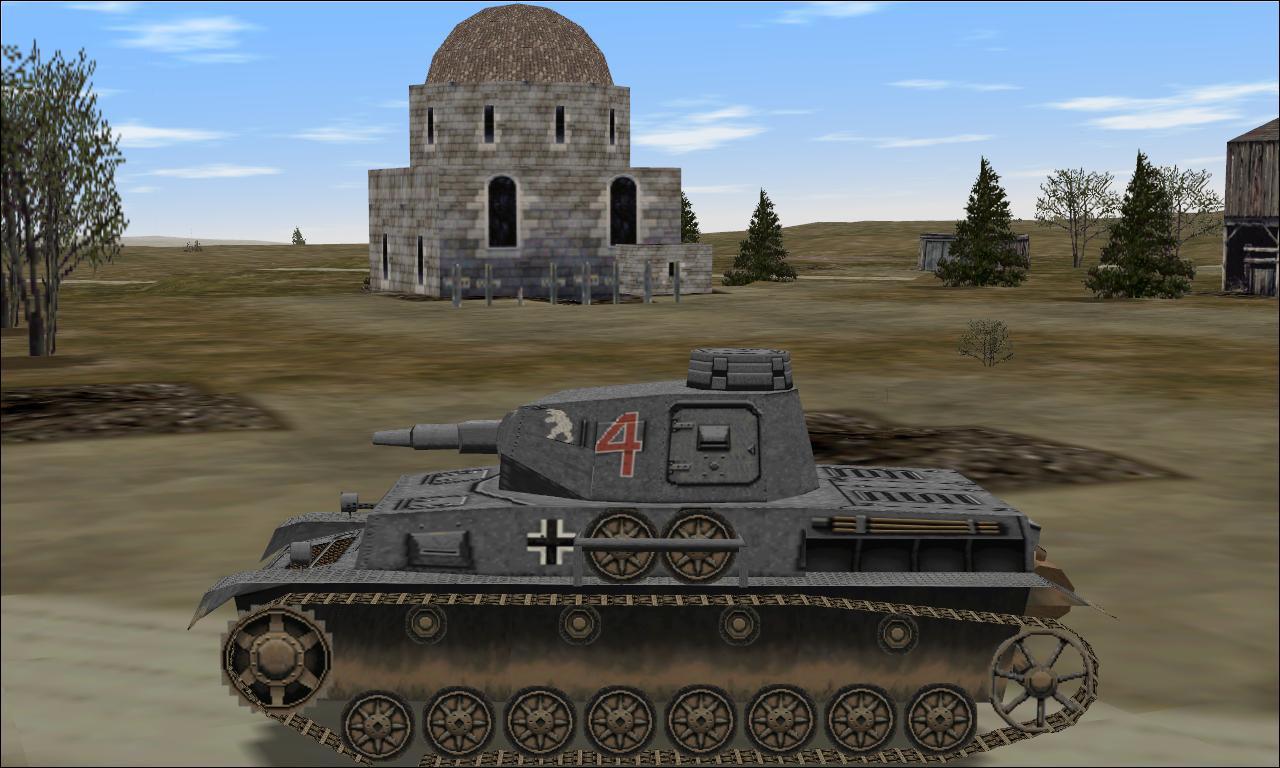
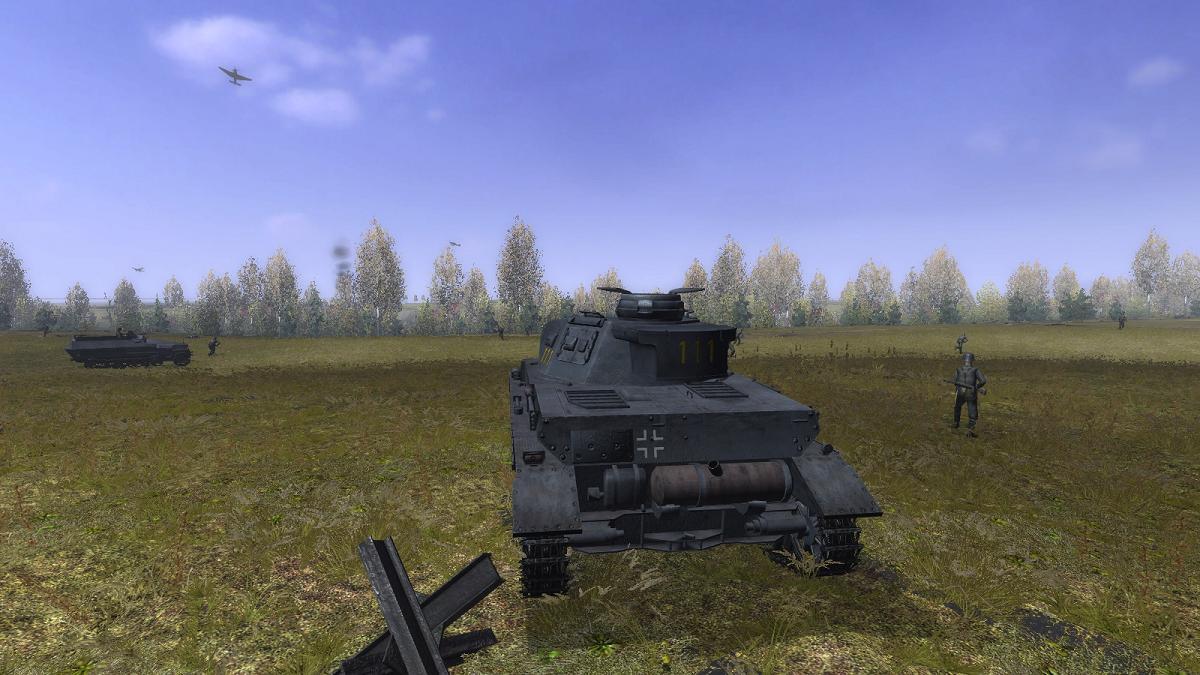
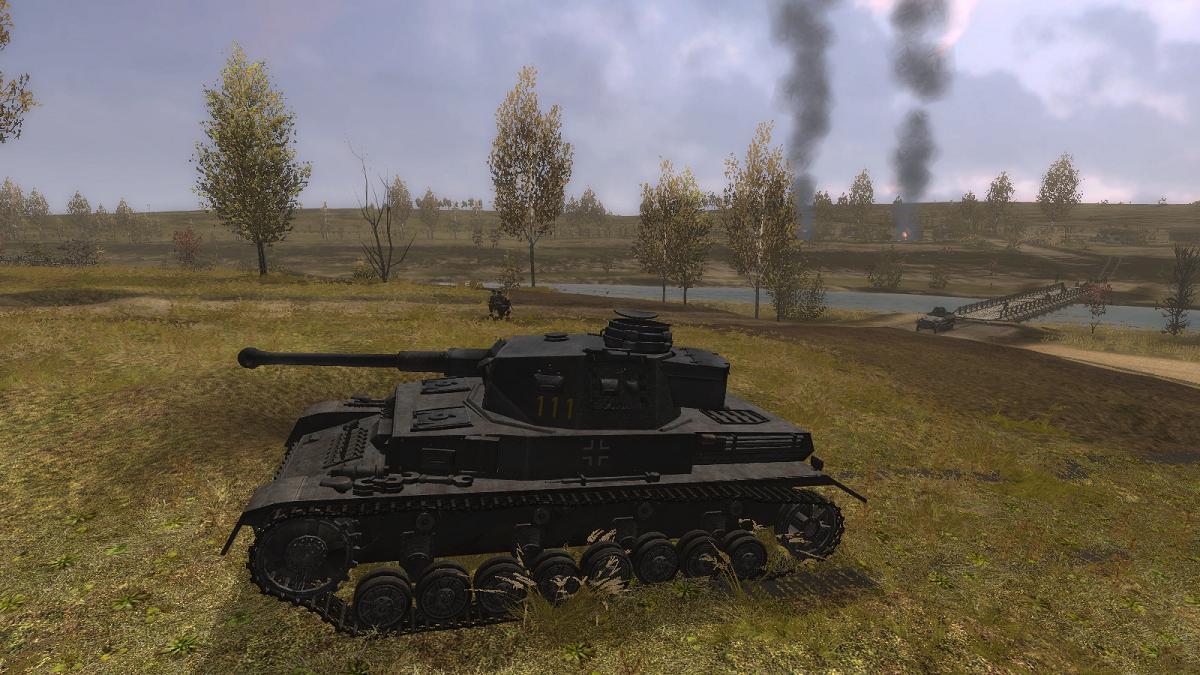
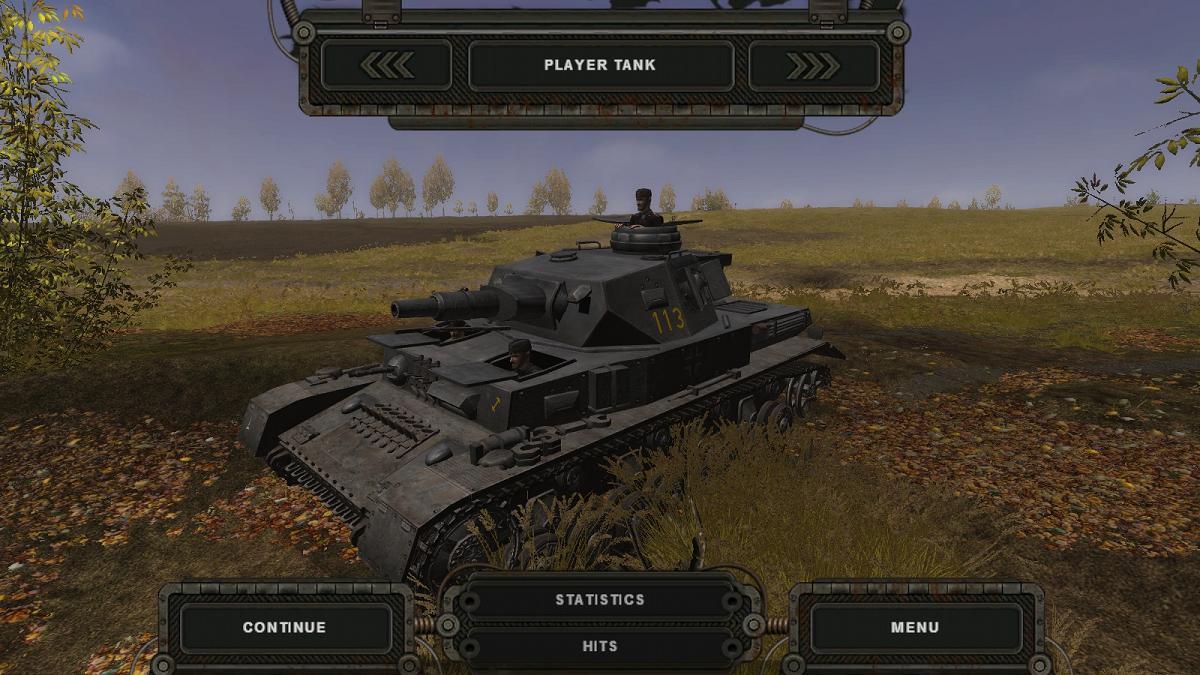
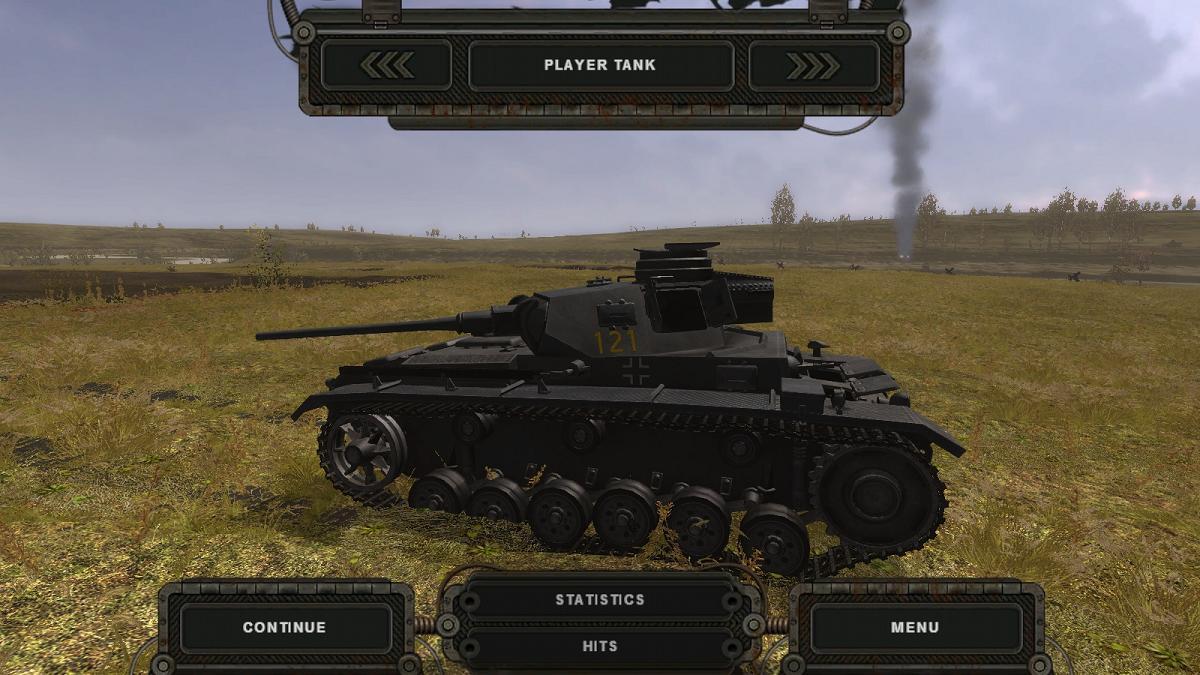
Fighting in the see-saw attacks and counterattacks in the May 1942 Battle of Kharkov, the opening mission puts me in a Panzer IV with just a short-barrelled 7.5cm gun, but to my surprise we do quite well and soon I've got a 'Mark 4 Special' (as the British called the up-gunned Panzer IV) with a long-barreled gun. The missions are all small-scale platoon-to-company scale battles which is fine. In the absence of any kind of role-playing or crew management, it would be nice if the briefings at least told me that I was Leutnant so-and-so commanding a platoon in such-and-such a Kompanie of such-and-such a Panzer Abteilung, detached to support such-and-such a Kompanie of such and such a Panzergrenadier Abteilung - instead of giving me mostly only the less relevant picture 'one [level] up' or 'two up', what the Regiment or Division is doing.
But while you have to work out who you're working with from the map screen symbols, the briefings are not bad at all and the missions quite realistic, with pre-programmed artillery and or Stuka support and representing fairly typical military operations at that level. And telling me at least whether I'm expected to be left, right or centre of the attacking force. Plus what our phase 1 and phase 2 objectives are. Typically, fight thru the enemy positions here and then occupy the ground there. Then hold off any counterattack.
If you have any sense of your responsibilities as a platoon leader (and perhaps depending on your game settings, as they affect morale) you have to watch you platoon mates carefully to keep them right and curtail the occasional exuberant but foolhardy charge at spotted enemies. But with care it is possible to do so, fighting your own tank while keeping the platoon moving together and even getting them all through in one piece. As in this mission...
...I've checked the map, put an HE round up the spout and ordered my Panzer IV platoon - two long guns, one short - into line abreast. I lead us down to the bridge that's our phase 1 objective, using a row of trees leading that way as our axis. By not dilly-dallying, I have managed to keep slightly ahead of the platoon of panzergrenadiers in half-tracked SPWs that I'm co-operating with on this mission. Friendly artillery has hit the town across the bridge, whose clearance will be our phase 2 objective.
From the halt and playing from the gunner's sight I engage and destroy a dug-in artillery piece my tank commander has indicated to me. There's some shooting off to my right but no more targets do I see. So I slip on and cross the bridge. My two platoon mates, without being told, hang about on the bank while I cross but a quick command from the map/orders screen has them crossing over to rejoin me, as I wait, hull-down from the village and watching my arcs. There's more firing going on over there but I'm going no-where till the boys are back with me. Running the whole platoon is my job, not winning the war on my own.

Moving off again and leading the platoon to a position from which we can see and fire into the nearest edge of the village, things hot up suddenly when a T-34 trundles into sight. I let him have the HE round I have up the spout and order an AP round loaded next, hosing the Ivan with the co-ax in the meantime but expecting to be blasted into oblivion at any moment. But all is well. Perhaps hit also by one of the platoon-mates I'd wisely waited for, the T-34's hatches fly open and the crew bails out and goes to ground. I spray them with more rounds from the co-ax and they lie still. Phew! That was a near thing!

At this point my number 3 - the bloke with the short gun - trundles forward as if he's on the scent of something and I call the platoon to a halt...something you seem to need to do regularly if they're not to get off the leash.
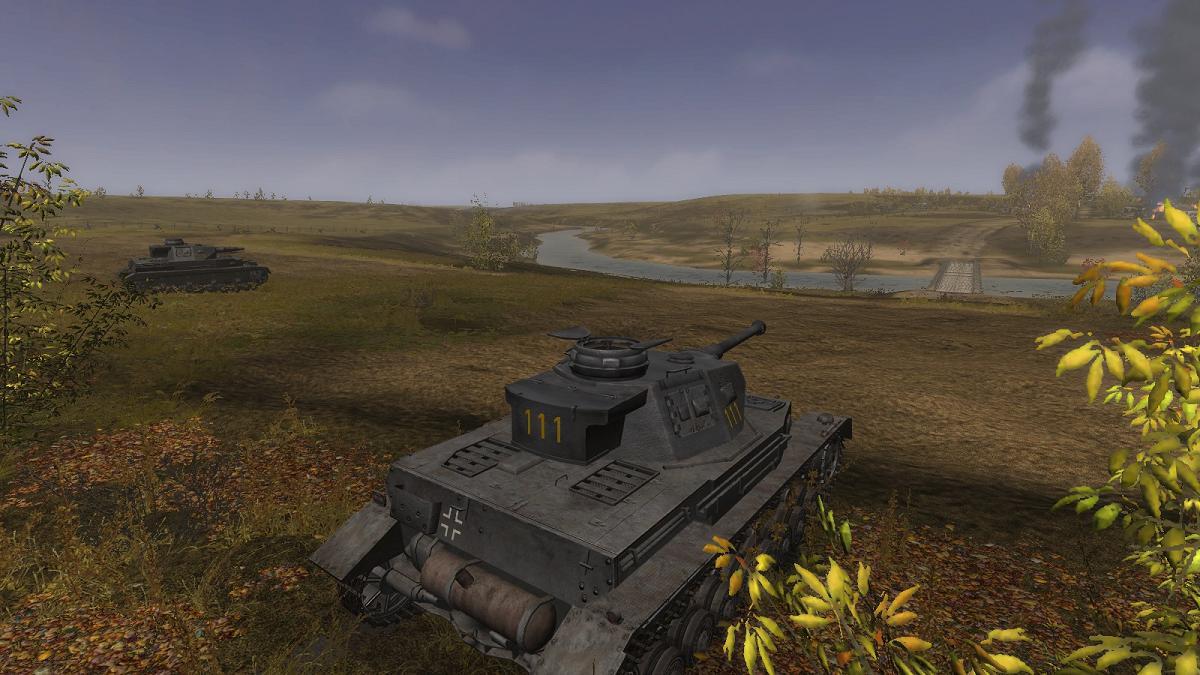
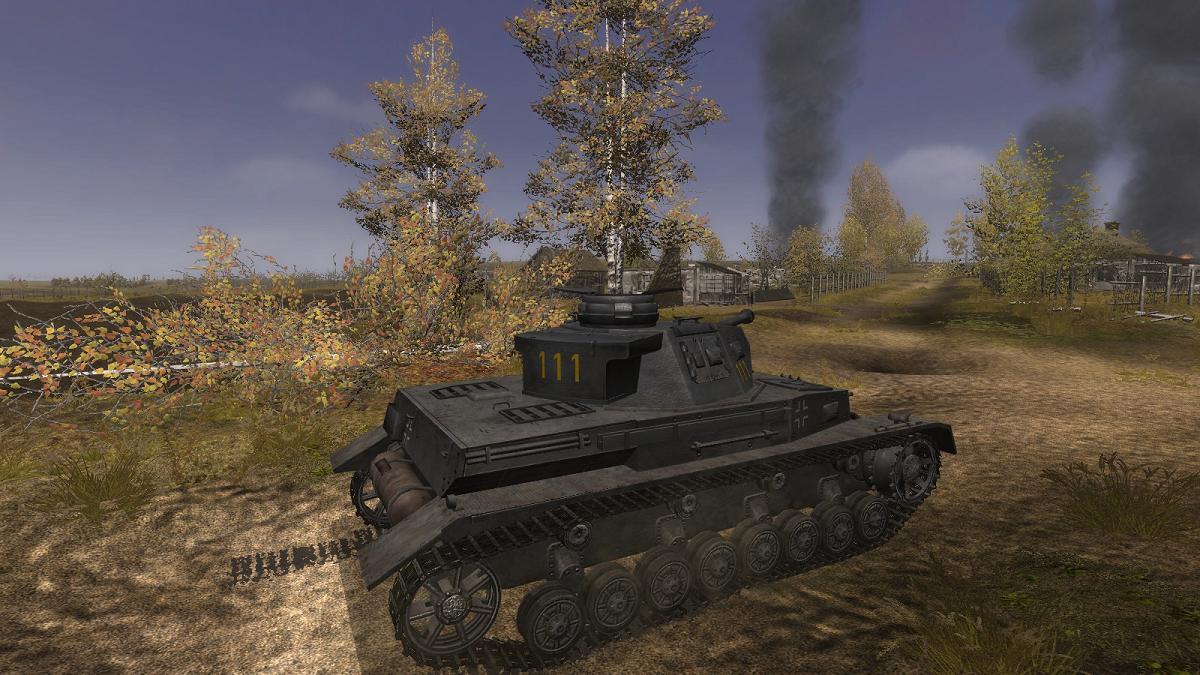
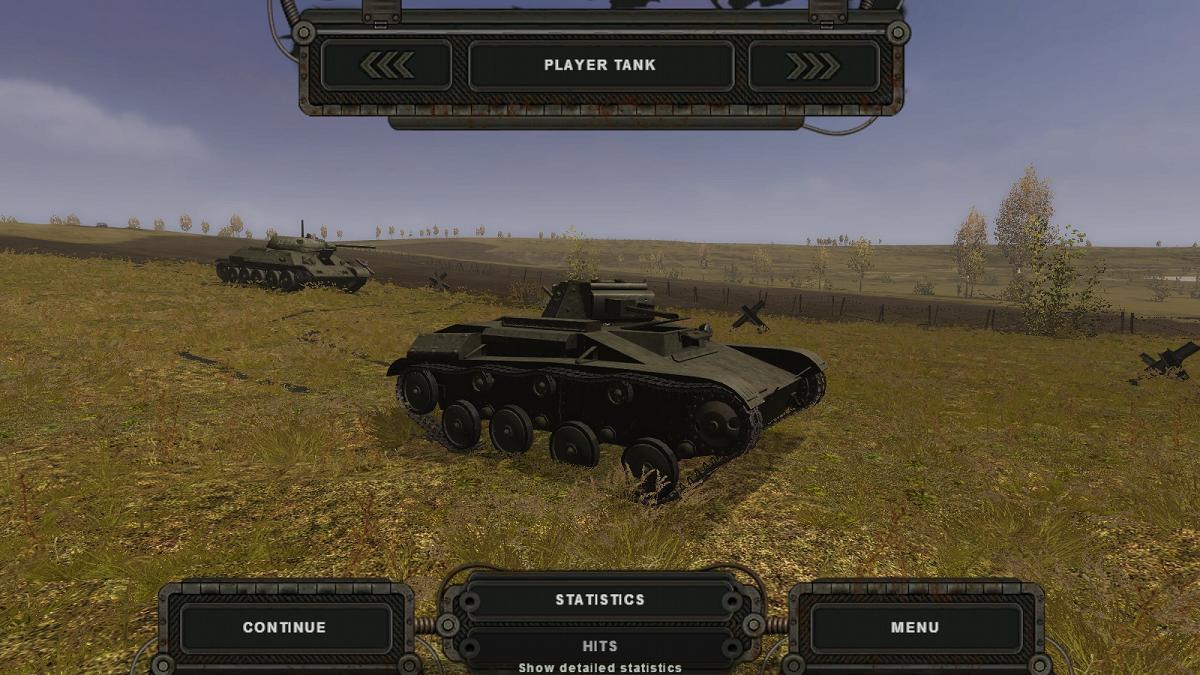
Scanning the village I spot and put a couple of rounds into a T-60 light tank that was struggling through some rubble. Firing seems to die away a tad. Looking back, I can see the SPWs have begun to cross the bridge, accompanied by some now-dismounted panzergrenadiers.
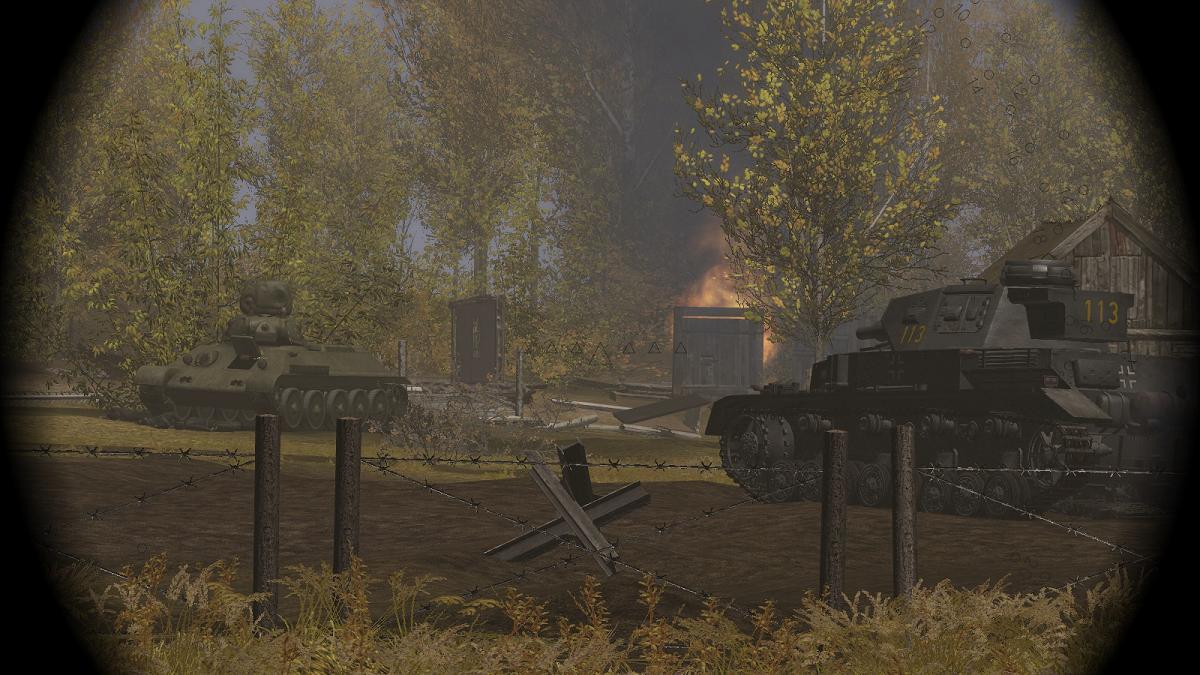
OK, back to my mission...I need to clear this hovel. Leaving my two platoon-mates halted either side to cover me from where they sit. I swing half right and make for a track which I see runs through the village, parallel to the river. I edge up to it and scan for targets. Even if there are no more tanks, the Soviets have powerful anti-tank rifles which are dangerous to a panzer's weak spots at close range.

I trundle along the track and catch a glimpse of a tank turret crossing from left to right where the ground dips on the far side of the village. I swing right off the track and halt, ready to ambush him if he tries to penetrate or flank the village.
There's an outbreak of heavy weapons fire and I see no more of the Ivan. Has he been knocked out? Or has he pulled back? I have no idea. But I'm reasonably hopeful he can't outflank or get in behind me, because my comrades are just behind me on either side, where I left them, to cover me.
I roll ahead again, just as cautiously as before, and emerge on the far side of the village. All is clear! Halted and observing towards the high ground ahead of me, I call my platoon mates forward, to rejoin me.

At this point, I spot and shoot a T-60 light tank which emerges from a dip in the open ground ahead of me, in full retreat. As if to avenge him, a T-34 suddenly drives forward from another fold in the ground and the whole platoon engages him, as do some other friendlies I can't see from my own position. The short firefight is soon over and we settle down to hold our newly-won ground.

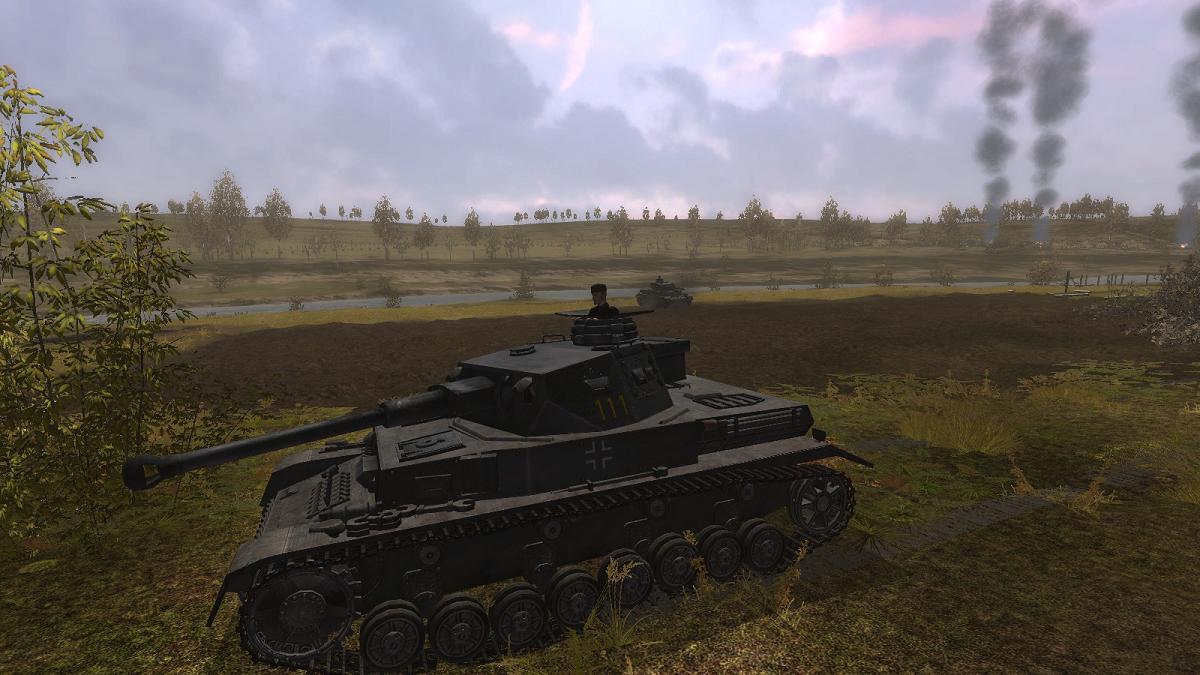
In the heat of battle I haven't managed too many screenshots but using SF's post-action tour facility I do the obligatory tour of our little battlefield, starting with my own tank's statistics. Not a bad 'bag' - I was credited with the T-34 at the village, as well as two light tanks and an ancient field gun.
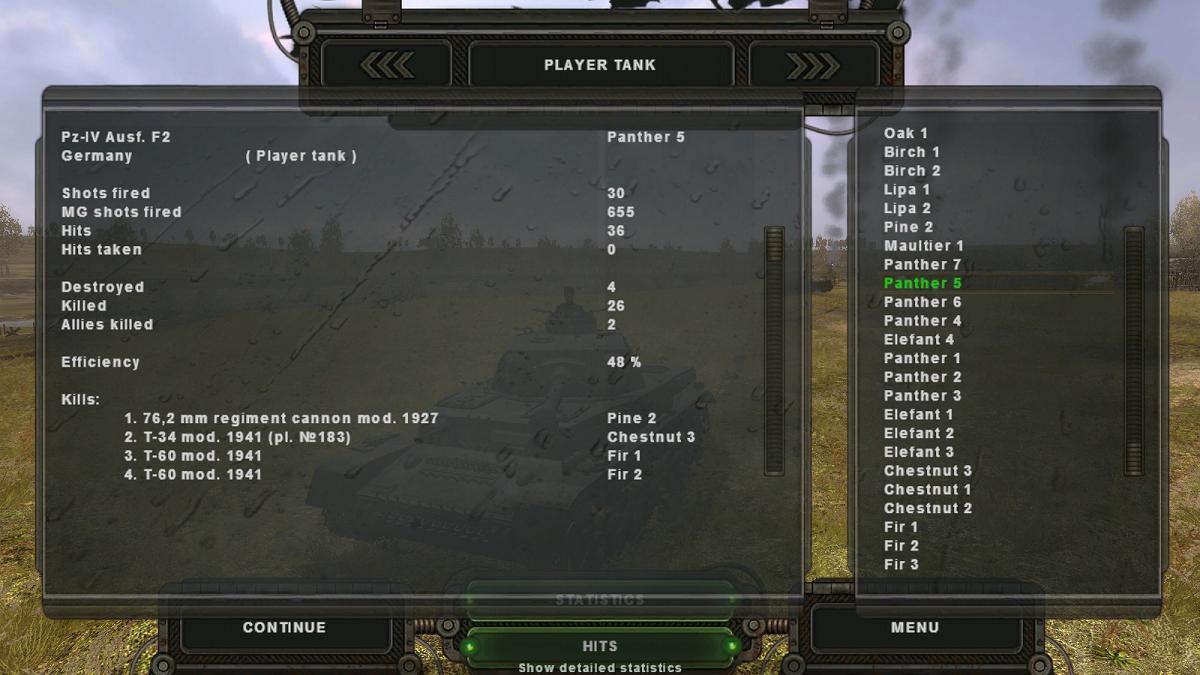
My platoon-mates had accounted only for some troops but their presence had definitely helped, if not actually saved my bacon. And perhaps best of all, I had brought my platoon through the fight without loss - to me, as important as winning the battle and more important than my personal score.
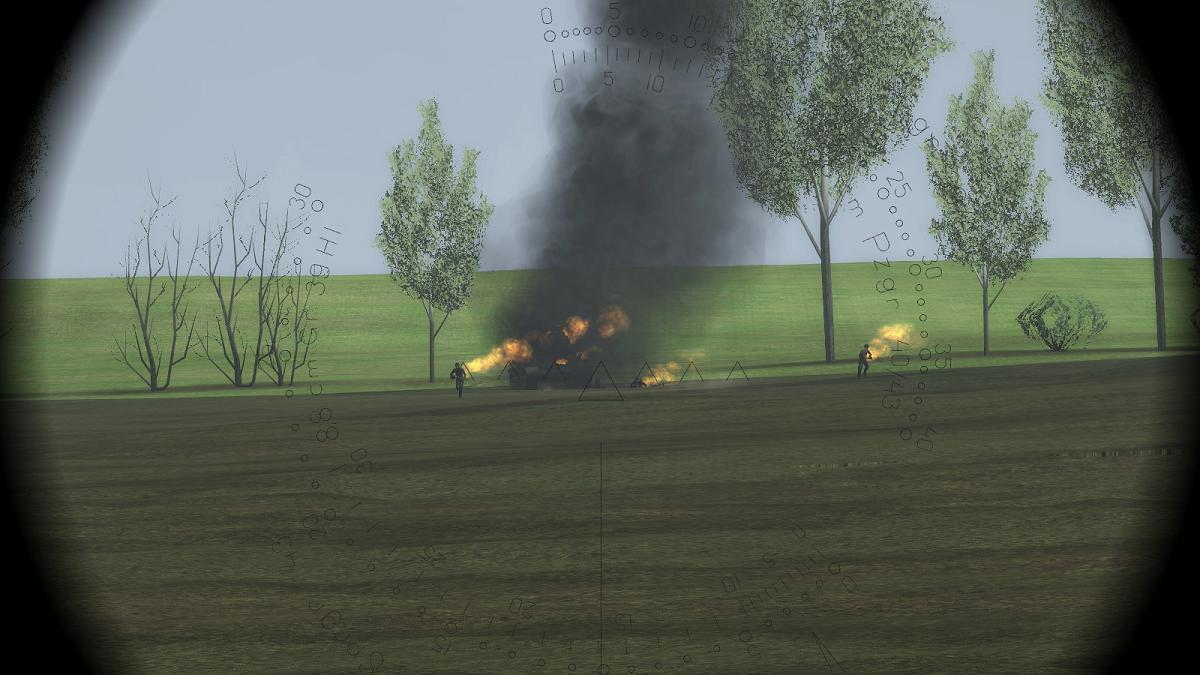
Here's the old field gun I knocked out early on...

...while this Maxim gun was likely a victim of the panzergrenadiers:

This is the T-34 I clobbered first, its crew scattered where I rather meanly mowed them down:

Here's the other T-34, with one of the knocked-out T-60s in front:

There were also some casualties I hadn't been aware of, namely another T-34, a Panzer III I hadn't realised was even on my side somewhere...and a hulking great KV-1, which had lost a track and therefore been unable to test its mettle against our special AP-40 tungsten-cored shot...though it's crew didn't seen too unhappy.


I'm really looking forward to concluding the stock German campaign, which benefits from being fought on real maps from the area as it was in mid-1942, as well as SF's excellently-modelled stock vehicles. The missions are quite realistic and exciting battles, without straying into Space Invaders territory, providing some scope for a reasonably cautious, tactical approach, rather than just drive and gun. One of the marks of a superior tanksim, in my book.