Okay another quick update, unfortunately due to a hangover I was not able to do as much as I had planned on... however given that I was not expecting to receive any of the items until next week I won't be too hard on myself :P
So the button and button housing are basically finished, the nut and bolt are only place holders I am going to use something else for the final fitting...
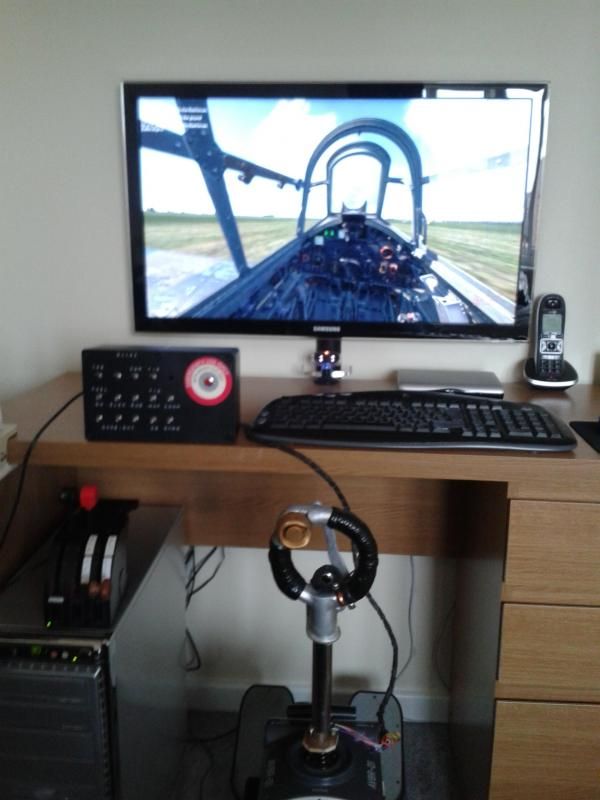
Finally here are some images of the button at work...
Cannons
Machine Guns
The only button I have yet to work on is the fire of both cannon and maching guns, this will be achieved by a slot in the button which will allow me to press on the centre and activate both buttons at the same time... Well that's the plan anyway :o
Obviously its nothing like an actually spade button but it works
Work is slowly progressing on the spade grip, I got hold of the brass parts of the button and have been trying to get the shape of the grip filed into them but its proving a hard task, I will probably have to live with a few gaps
FYI its held together with bluetak atm
So a bit more filing is required and hopefully the circuit board will arrive tomorrow so I can test the buttons a few finishing touches and by next week it should all be done.
Thanks Maister, its aluminium but unfortunately I am not sure what grade it is.
I have a few more bits and pieces to go, I loath working with Brass and thats the final piece of the jigsaw.
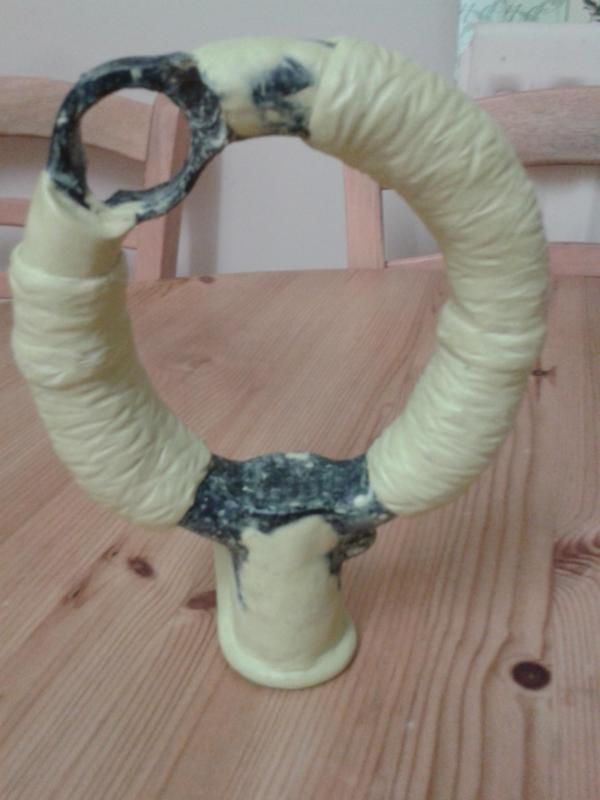
I spend about three hours yesterday kneading putty epoxy and wrapping it around the string and then another three after it had dried scoring the putty to give the grip effect...
Krupy, may I ask where you got the trigger assembly parts from?? Got an aluminium spade grip casting myself, and still are looking for the trigger parts.... Great job!!
Looks fabulous Krupi! You did a great job with the grip texture. The angle of the switch seems to be a bit off compared to your reference. Maybe it is easy to fix. Did you put some potmeter under the brake lever?
Thanks, I just put the button there for the picture its not in the final place yet (nice spot).
I could have used a potmeter but decided to drill a hole in the raised section on the back and attach a button. With the brake lever i drilled a hole in short curved "arm" and put a bolt with a few washers in it, this way the brake lever only travels the distance I want it to.
I will upload some more images tomorrow to make it a bit clearer.
The early Machine gun spade grips is totally different to the MkV Cannon/Machine gun grip..Been there tried that... You really have to start with a MkV grip Which is as rare as hens teeth and veeeeeery expensive..
The first two pics are the cannon grip.The bottom the early Spit spade grip..We sent a full 3D file of the MkV grip to Tarmack Aces to rapid Prototype in return for a produced grip.It was complete except for the rocker switch.We have received nothing so far...Sooo a leetle bit hesitant in helping people..
The first two pics are the cannon grip.The bottom the early Spit spade grip..We sent a full 3D file of the MkV grip to Tarmack Aces to rapid Prototype in return for a produced grip.It was complete except for the rocker switch.We have received nothing so far...Sooo a leetle bit hesitant in helping people..
Not really seeing much difference other than the cannon connection...!
Not really seeing much difference other than the cannon connection...!
Correct But it does change it enough to be a pain..
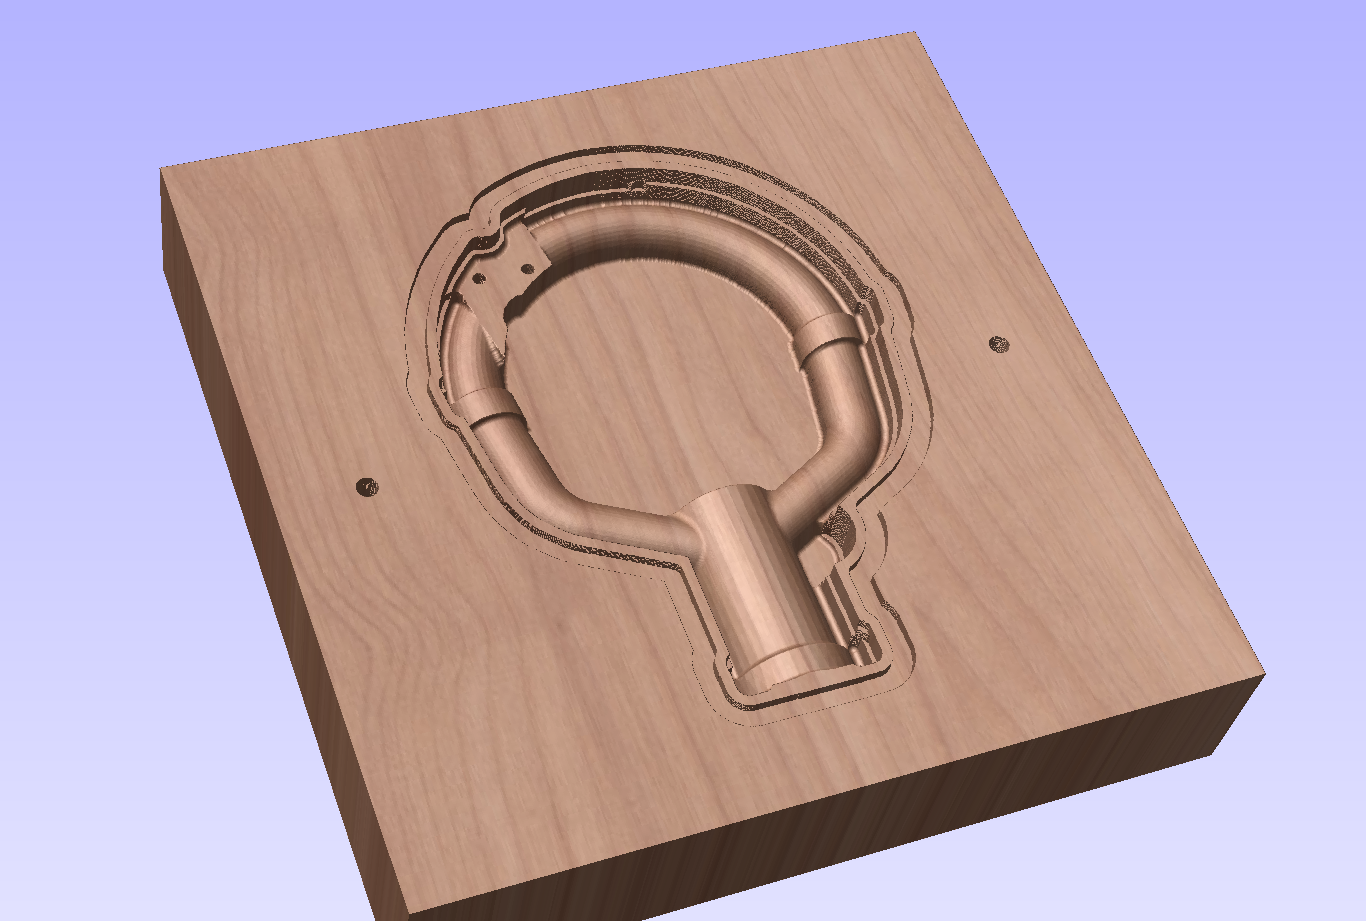
Gene I still have the Solidworks 3D file of the cannon spade grip if your interested in firing up the Shopbot Here is a pic of the grip we got the measurements from..
First one will be made from high density pink insulation foam. If that works out, I'll build a block of material by laminating a few layers of 3/4" Baltic Birch together. That'll look really cool if it works out.
Yes. What I did was create a cnc program that bored two pin holes diagonally opposed into a base plate. I then drilled the same two holes in the block. I set dowel pins into the base, set the blank in the pins and then bored two more holes so they'd line up in the same position when the blank was flipped.
there's a bloke on ebay uk that makes/casts them himself, you could get the grip and lever for under �100, don't pay stupidly extortionate prices from the likes of Sspares!
"What join the Regiment.....?! nah I'll run them over n if that doesn't work then I'll shoot at them,cpl"
Is difficult get info about dimension - above Krupi say ~140mm as width, in another forum the guy say 130mm... I did more close to 130mm. The info about fire button I receive from a collector in Keypublishing forum (seem that a guy from there write a book about this grips). Curiously I don't see pictures on Web similar to those drawing - and Krupi cast - that have large flange on base and different support for brake cable than AH2174 or AH8068. Is supposedly for Spitfire Mk.IX.
Is difficult get info about dimension - above Krupi say ~140mm as width, in another forum the guy say 130mm... I did more close to 130mm. The info about fire button I receive from a collector in Keypublishing forum (seem that a guy from there write a book about this grips). Curiously I don't see pictures on Web similar to those drawing - and Krupi cast - that have large flange on base and different support for brake cable than AH2174 or AH8068. Is supposedly for Spitfire Mk.IX.
Sokol1
Very nicely done mate
I had toyed with the idea of PVC tubing myself, but I dont believe I'd get anywhere near a good a job as you've produced
Actually Sokol, given the end result, a thread of it's own for your PVC spade grip might be called for. I'd love to know more about the materials you used and the techniques you used to put it together to get the end result that you did.
Excellent! That stupid thing has been around the world *twice*. First time was my fault. *laughs*
I still haven't had a chance to tweak the model you sent in order to add the hole for the brake lever. I did buy the needed heat-set inserts for it though. I need a clone to do my day job so I can spend all my time tinkering with flight simulators.
Ha! That's great! I take it you made some kind of mold from it first?
I hope to some day get back to working on the other model you sent in order to produce something more usable. I've already got the heat-set insert required to properly fit the brake handle mounting bolt.
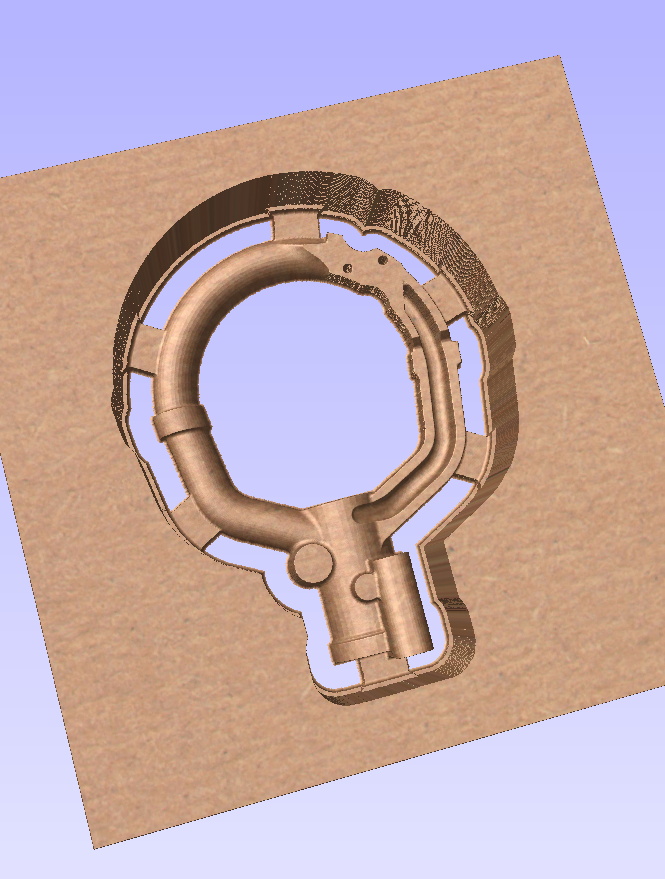
How hard is it going to be to clear the wiring channel along the right arc?
Gene, the channel has little to no draft, it would be nearly impossible to remove the master from the cast without disturbing the sand, no matter how tightly it is packed. The only option would be to add it in as a core, which would be thin and fragile, and require additional steps, like adding keys to ensure the core is properly aligned
Hey guys now have the Cannon Spade grip for sale at my Shapeways shop and also the rocker button and housing as separate pieces.Will add more bits and pieces in time.Also have other replica spit bits for sale as well.
With some "picture archeology" on Web figure how "BBC" safety-fire plate lock work, is just 2 pins.
In the above sketch the pins are draw too small, they are more tall and when out of 9:00-15:00 position prevent the trigger move down. They support - part with tooth just turn around the barrels.
The CAM in the second gear moves the indicator pin up.
69th_Zeb
Junior Member
Joined: Jan 2016
Posts: 34
Idaho
Sculpting it out of steel. Coming along slowly as I've just started welding after not doing so for many years. Would like to cast one out of aluminum next year when I get to it, but I thought I could make one the kids couldn't destroy!
"There were also components supplied on a turnkey basis, like the Dunlop Spade Grip, for which there are no formal drawings to be found. In those cases we have to rely on actual measurements taken from surviving equipment."


![[Linked Image]](https://s22.postimg.cc/o8j01p69d/Controls_Manual_1a.jpg)


![[Linked Image]](https://s22.postimg.cc/v6r0fa87h/bbc_3.jpg)
![[Linked Image]](https://s31.postimg.cc/4u5fzfsgr/BBC_safety_lock.jpg)

![[Linked Image]](http://SimHQ.com/forum/tmp/9857.jpg)