|
#3179628 - 01/14/11 07:11 PM
 Re: MMaister's KG13A project!
[Re: VO101MMaister]
Re: MMaister's KG13A project!
[Re: VO101MMaister]
|
Joined: May 2000
Posts: 2,536
AV8R

Senior Member
|
Senior Member
Joined: May 2000
Posts: 2,536
Southern California USA
|
MM, I think you have some good options to explore before looking to reinvent the wheel with a new switch... 1. Contact Horst for the switches he used to make his KG13s 2. Contact the guys selling the KG13 sim control stick Tarmac Aces site, then go to KG13 stick 3. See what this other guy used that just posted his stick 4. Pull apart an old TM F16 stick and use its guts If these dont pan out, ill try to help you find a micro momentary switch, like: 6mm x 6mm momentary switch or tactile switches Then you can hide the Leo PCB inside the KG13 electrical box.
AV8R
|
|
|
#3179726 - 01/14/11 08:44 PM
Re: MMaister's KG13A project!
[Re: VO101MMaister]
|
Joined: Oct 2010
Posts: 217
VO101MMaister
Member
|
Member
Joined: Oct 2010
Posts: 217
Haugesund, Norway
|
Thanks Chaps for the help, now at least I have an idea what should I have  I planned to buy some simple switches, and to ask the guys at my workplace to machine some sockets and caps from black plastic. But of course If they are already available, i am not dumb to work in vane. Hans, I sent a mail to you regarding the buttons. It is a pitty that you deleted the pictures of your steurkn�ppel. It looks amazing!!
|
|
|
#3193254 - 01/30/11 04:16 PM
Re: MMaister's KG13A project!
[Re: VO101MMaister]
|
Joined: Jan 2011
Posts: 149
Baur
Member
|
Member
Joined: Jan 2011
Posts: 149
Russia, Sochi
|
Hi guys, I really liked the work VO101MMaister. I also want to make yourself KG13A. I live in Russia. And manufacture control device for the simulator Il2 Shturmovik Therefore, the desired size from the first page. AV8R, I beg you to give the dimensions A, B, C, D, F, H, G, I, J, L, M, O, N, R, S, P. I do not speak English. Translate the text in the translator http://translate.google.ru/
|
|
|
#3195154 - 02/01/11 10:11 AM
Re: MMaister's KG13A project!
[Re: VO101MMaister]
|
Joined: Jan 2011
Posts: 149
Baur
Member
|
Member
Joined: Jan 2011
Posts: 149
Russia, Sochi
|
I will be very hard to do this without the knowledge of the English language. Unfortunately, I have not found such a number of different control devices, what we do in Russia. On your forums, just like a nice appearance. In Russia, the first simulation of flight control. But I'll try to explain: I understand that the question applies here to this option mechanics - http://avia-sim.ru/forum/viewtopic.php?t=577&postdays=0&postorder=asc&start=75
|
|
|
#3195264 - 02/01/11 01:44 PM
Re: MMaister's KG13A project!
[Re: AndyB]
|
Joined: Jan 2011
Posts: 149
Baur
Member
|
Member
Joined: Jan 2011
Posts: 149
Russia, Sochi
|
I think I understand.
Because the two levers put equal pressure on the bearing attached to the stick you can release it in any position and it will stay there.
Am I correct ?
Yeah, right! But it's not all! Having the same mechanic, you can do pass through the center stick control sensitive or not. For this we need to replace the two levers and change sensations of motion control stick Availability Center - constant discussions with our pilots' flight simulators. Andy, here is a pedal - http://avia-sim.ru/forum/viewtopic.php?t=584 http://avia-sim.ru/forum/viewtopic.php?t=575 They are simple, but I think it will be interesting to see. They are similar to the fighter Bf-109 and FW-190. And from the Mi-8 helicopter.
|
|
|
#3236644 - 03/17/11 03:35 PM
Re: MMaister's KG13A project!
[Re: VO101MMaister]
|
Joined: Oct 2010
Posts: 217
VO101MMaister
Member
|
Member
Joined: Oct 2010
Posts: 217
Haugesund, Norway
|
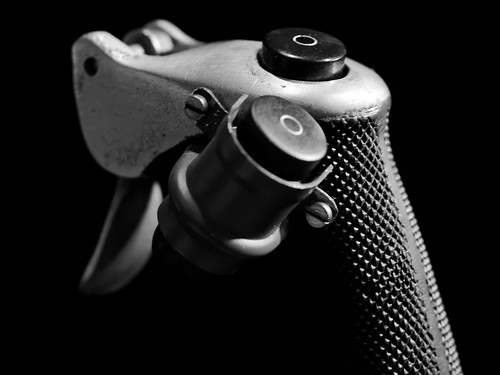
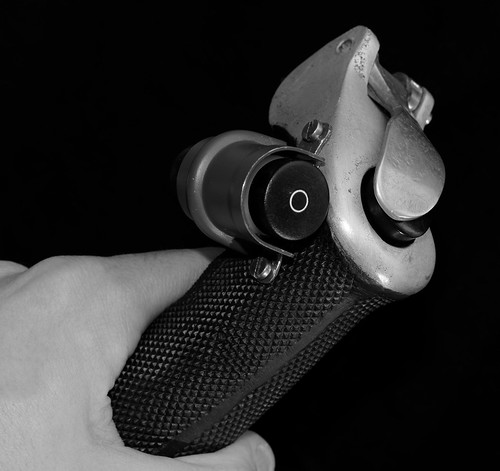
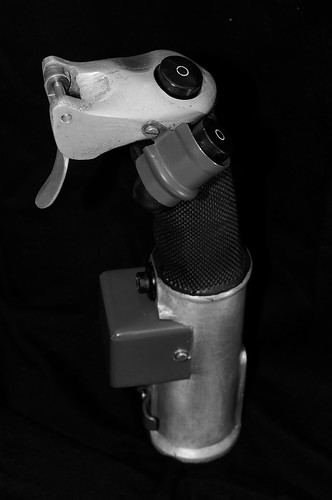
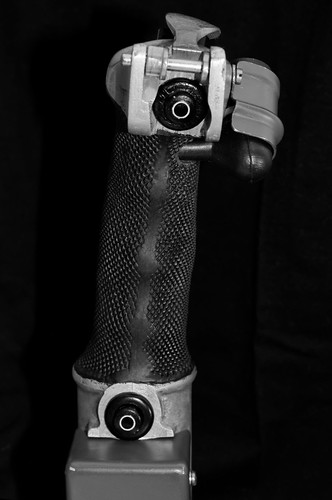
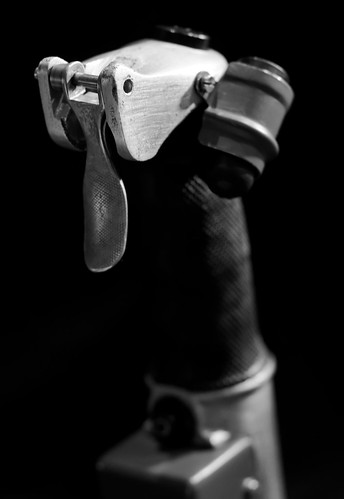
Hi everyone, after almost a half year, some hundred hours of planning, experimenting, handcrafting and spending a few hundreds bucks my project has come to an end:)  DSC_1036 DSC_1036 by csaba.moharos, on Flickr As a last step of machining I had milled the holes of the button holding screws. Then I started to paint the stick. That was realy fun. After studying lot of reference pictures I used semigloss black for the stick and gloss black for the junction box. I decided to make some weathering on it, so now it shows some patina. I sanded some paint down here and there, and made the screws corroded a bit with vinegar:). I mounted the sign plate and finally soldered wires to the buttons. Finally I could install the trigger properly and trim the trigger spring. Now everything is installed and fixed, all the functions work properly, ready for some future action:) All along the project I have tried to stick to the real Steuerkn�ppel as much as possible, and I am very happy with the result. Thank you all for following and commenting this thread. Thank you for your help and ideas. I am especially thankful for my friend VO101_Menyus, who made the casting for me, to Balazs Schuller who helped me to find a solution for the "Fischhaut", to Horst Rienecker, who supplied fantastic original parts and valuable information about the real thing, to Hans "Boandlgramer" Schmid who generously offered and sent me super buttons and the Tarmac Aces, who also supplied me a set of buttons and their piece of art works were really motivating as well. The next task is to build a proper base for this grip. I already have some ideas and I have begun to make design sketches. I will open another thread for it soon. Cheers MM And here are some more pictures of course:) 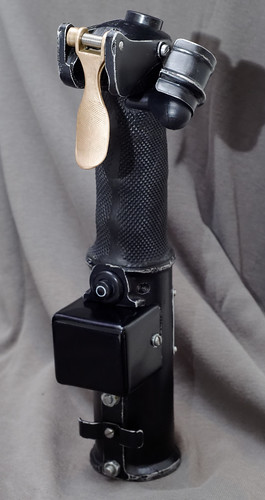 DSC_0098_DxO DSC_0098_DxO by csaba.moharos, on Flickr 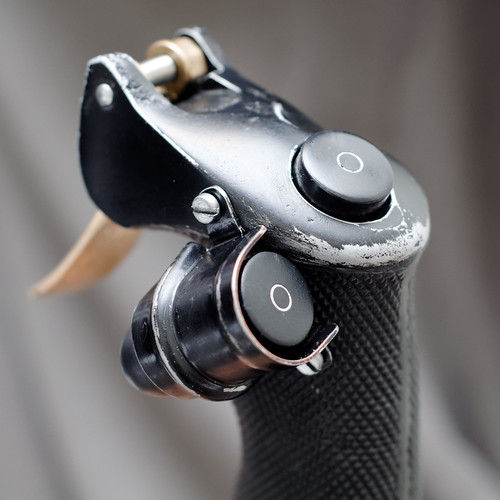 DSC_0095_DxO DSC_0095_DxO by csaba.moharos, on Flickr 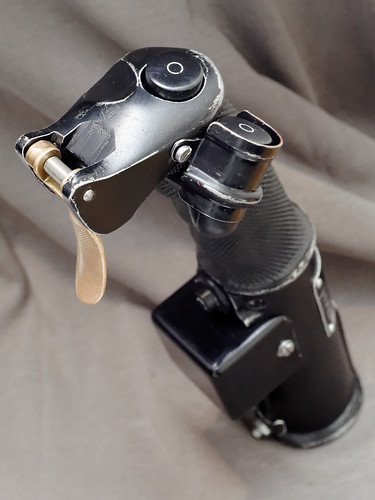 DSC_0091_DxO DSC_0091_DxO by csaba.moharos, on Flickr 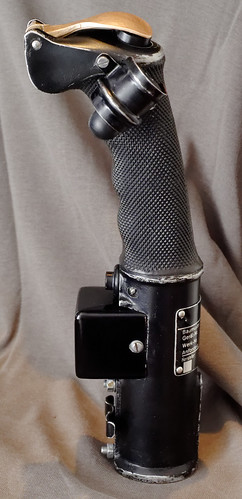 DSC_0087_DxO DSC_0087_DxO by csaba.moharos, on Flickr 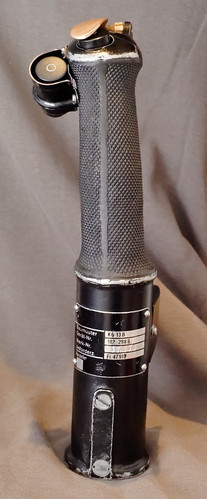 DSC_0086_DxO DSC_0086_DxO by csaba.moharos, on Flickr  DSC_0085_DxO DSC_0085_DxO by csaba.moharos, on Flickr 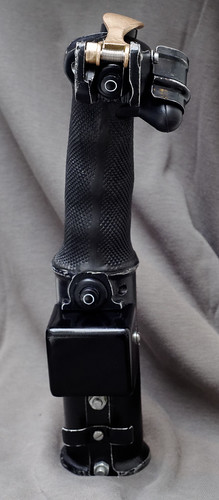 DSC_0084_DxO DSC_0084_DxO by csaba.moharos, on Flickr 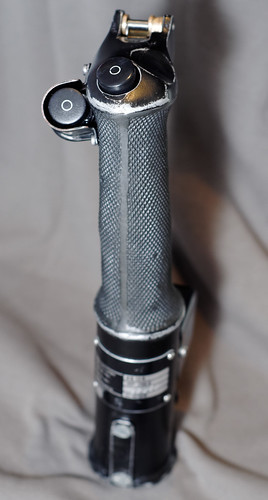 DSC_0079_DxO DSC_0079_DxO by csaba.moharos, on Flickr 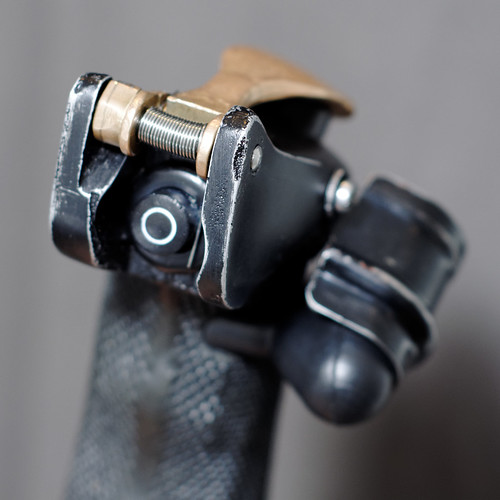 DSC_0077_DxO DSC_0077_DxO by csaba.moharos, on Flickr  DSC_0076_DxO DSC_0076_DxO by csaba.moharos, on Flickr 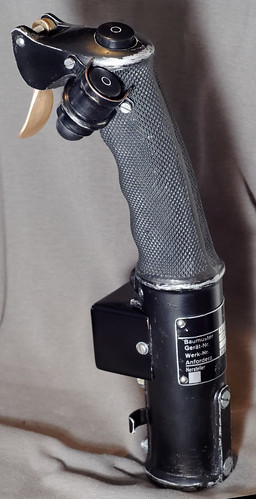 DSC_0065_DxO DSC_0065_DxO by csaba.moharos, on Flickr
|
|
|
|
|
|
|
|
|
|
|
|
|
|
|
|
|
|
|
|
|
Exodus
by RedOneAlpha. 04/18/24 05:46 PM
|
|