by Erik “EinsteinEP” Pierce and Chuck “Magnum” Ankenbauer
 Now that the first version of the DCS: Combined Arms open beta is available, you have some learnin’ to do. This article will provide you with the elements to get you going. It is not intended as a Preview or a Review of DCS: Combined Arms. Those will come later. Think of this article as a training primer.
Getting Started
Before getting into the Ground Commander / JTAC functions, you need to learn how to use the DCS: Combined Arms interface and control your ground forces. Fortunately, we have some good reference videos already produced.
Check out Magnum’s “Basics” video:

DCS: Combined Arms – Basics
And Matt Wagner’s “Command Map” and “Tank Gunnery” videos:

DCS: Combined Arms – Command Map Hands-On

DCS: Combined Arms – NATO Tank Gunnery

DCS: Combined Arms – IFV Tank Gunnery
Battlefield Planning
Now that you have the basics down, take a look at the battlefield (using the F10 map view) and figure out how the air element should factor in your battle plans. Do you want them taking out artillery behind the lines? Or weakening the enemy tanks on the front lines to support the advance of your ground troops? Remember that anti-air threats, like SAMs and AAA units, will threaten, harass, and otherwise render your air force less than 100% effective. Don’t forget to target them as well, with your air forces or your own ground forces (artillery, etc.).
Although as Ground Commander, you have immediate access to the F10 map for situational awareness, your support pilots will have their hands too full with flying their aircraft and avoiding threats to be able to focus on interpreting the map. It’s up to you coordinate their attack and egress to maximize their effectiveness.
A note here. it is about impossible to effectively coordinate air attacks without voice communication. Yes, it can be done via text chat, but I strongly recommend against it. You simply won’t be able to communicate effectively and efficiently or fast enough to respond on the dynamic battlefield. If you haven’t already, now is the time to invest in a decent headset and install Teamspeak 3. The SimHQ Teamspeak 3 Server is free to SimHQ registered users and you’ll always find plenty of folks willing to join in and help. Info on connecting is here(member log-in required).
Initial Point
It’s common practice for the Ground Commander / JTAC to establish one or more coordinates near the battlefield that attack aircraft will use as the beginning of their attack leg into enemy territory. This point is called the Initial Point (or Battle Position for rotorcraft). As you give targets to your aircraft, they will begin their run in from this point to the target, and then exit the area (egress) based on your recommendation (you know where the anti-air units are, right?… right?!). You can set up several IPs to conduct attacks from different directions, just be sure you communicate those locations to your pilots BEFORE you need them to get there.
An attack pilot needs more than just coordinates to execute a successful attack: what the target is, whether or not there are friendlies nearby, if the target will be marked by smoke, laser, or not at all, etc. So, in addition to the target’s location, you will need to provide this additional information, plus any amplifying information, like requesting a specific weapon, notifying the pilot of any nearby threats, etc.
The “9 Line”
Take all that information, put it into an standardized convention, and you’ve got the JTAC CAS 9 line. Any good JTAC will know how to generate and deliver a 9 line. This standardized 9 lines of information is usually followed by remarks and additional amplifying information: read the Close Air Support Joint Publication document to learn more about this process.
The direct version:
1. Initial Point (or Battle Point for helicopters) reference: “IP Charlie…”
2. Heading from IP: “2-1-0 degrees…”
3. Distance from IP: “1-1 miles…”
4. Target elevation: “at 4-2-5 ft MSL…”
5. Target description: “4 stationary artillery vehicles…”
6. Target location (Lat long or MGRS): “north 4-3 5-4 point 4-1-6, east 0-4-2 4-2 point 7-0-0…”
7. Type of mark: “marked by orange smoke…”
8. Location of friendlies: “friendlies 4 miles west…”
9. Egress: “egress west”

JTAC calls the smoke
Even if you don’t want to go through all the work to create a “by the book” 9 line, you will need to give your attack pilots this basic information:
Where the target is. Coordinates help, but any kind of information the pilot can use to pick out the target from the ground clutter is helpful. No fair using labels!
What the target is. If there’s a tank and an anti air target next to each other and you want your pilot to hit the anti-air unit first, be sure to tell them that. They’re no better at reading your mind than you are at reading theirs!
What sort of mark is on the target (if any). Include laser code, if lasing. If the target is offset from the mark, give reference in cardinal directions, e.g., “Target is 400 m to the north of the smoke”.
If you want your pilots to stay alive, you’ll also need to let them know where the threats are and give them helpful directions to avoid flying into those threats.
Some Tips
Give coordinates in a consistent frame.
Lat Long decimal and MGRS grid are the two coordinate systems that the A-10C pilot can easily enter into their CDU. The Shark uses Lat Long decimal as well. Check the “Misc” tab under your Options menu to change the default coordinates listed in the F10 map and in your JTAC monocle. Remember that Su-25 and P-51D pilots don’t have any way to manually enter coordinates, so you’ll have to talk those pilots onto the target using visual cues.
Note. You can get the coordinates for a point by hovering the mouse cursor over that point in the F10 map (upper left corner), clicking the enemy unit in the F10 map (bottom left corner), or by lasing a target through the JTAC monocle. Be aware that if the range to the target is greater than 10 km, the laser won’t reach and the coordinates listed at the bottom of the monocle will be YOUR OWN POSITION!!! (see step 4 below).

A non-zero range at the right tells you the numbers at the bottom
are the target’s coordinates, not your own.
Pick the right weapon for the job.
It might be fun to watch LGBs drop on your laser designation, but if the target is a tightly packed column of T-80 tanks, the CBU-97s hanging under the aircraft would do more damage in a single pass. Similarly, if the target is well defended by air defenses, a long-ranged attack with Mavericks would be a better choice than a more flashy gun run.
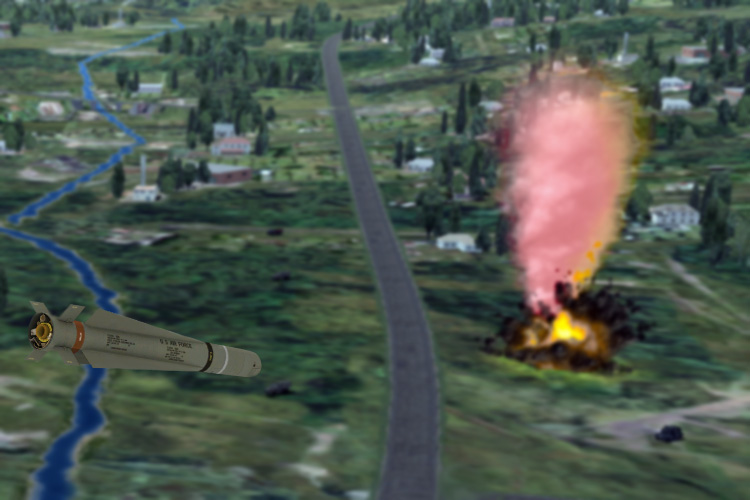
Mavericks can reach past many air defenses.
Walk your pilots onto your targets.
Guide pilots onto targets using big to small cues and be sure to give directions from their perspective. For example: “Turn to your right and fly down the big valley. Just past the river there is a large block of trees. The target is about ½ mile on the other side of the trees. Target is 200 ft to the left of the orange smoke.”

The world looks a lot different from 6,000 ft than from the F10 map.
Get confirmation that the pilot has the right target.
The smoke option helps, but use whatever you can to determine that the pilot is looking at the same target you are: location, orientation, proximity to other objects, etc. A well-coordinated attack on the wrong target can be as big a failure as a missed attack. You especially want positive confirmation when friendly forces are in the area.

“Uhhh… which tank at which orange smoke did you want me to strafe?”
Coordinate the egress of the pilot.
Once the attack is over, be sure to direct the pilot to egress in a way that will allow them to exit safely and set them up for the next attack. It may be a simulation, but it’s really annoying to get shot down on every attack run!
The above steps can be challenging, especially in a dynamically changing battlefield, but add a few more planes to the mix and the workload just to coordinate planes in and out can be overwhelming… but oh so rewarding! See you out there!
We want your Feedback. Please let us know what you thought of this article here.
The SimHQ DCS: Combined Arms Forum is here.